Peanut Butter Oat Energy Bites

Make easy Peanut Butter Oat Energy Bites with oats, peanut butter, honey, and chia seeds. A chewy, no-bake snack ready in 40 minutes.
10 min
Make creamy 5-Ingredient Garlic Hummus in just 10 minutes with chickpeas, tahini, fresh garlic, lemon juice, and olive oil.
 Sarah Bennett· Meal Prep Expert & Recipe DeveloperSeptember 8, 2026

Ask your favorite AI assistant to summarize this recipe, suggest swaps, or scale it up — one click away.
We copy the prompt to your clipboard too — just paste (Ctrl/Cmd+V) if it doesn't appear automatically.
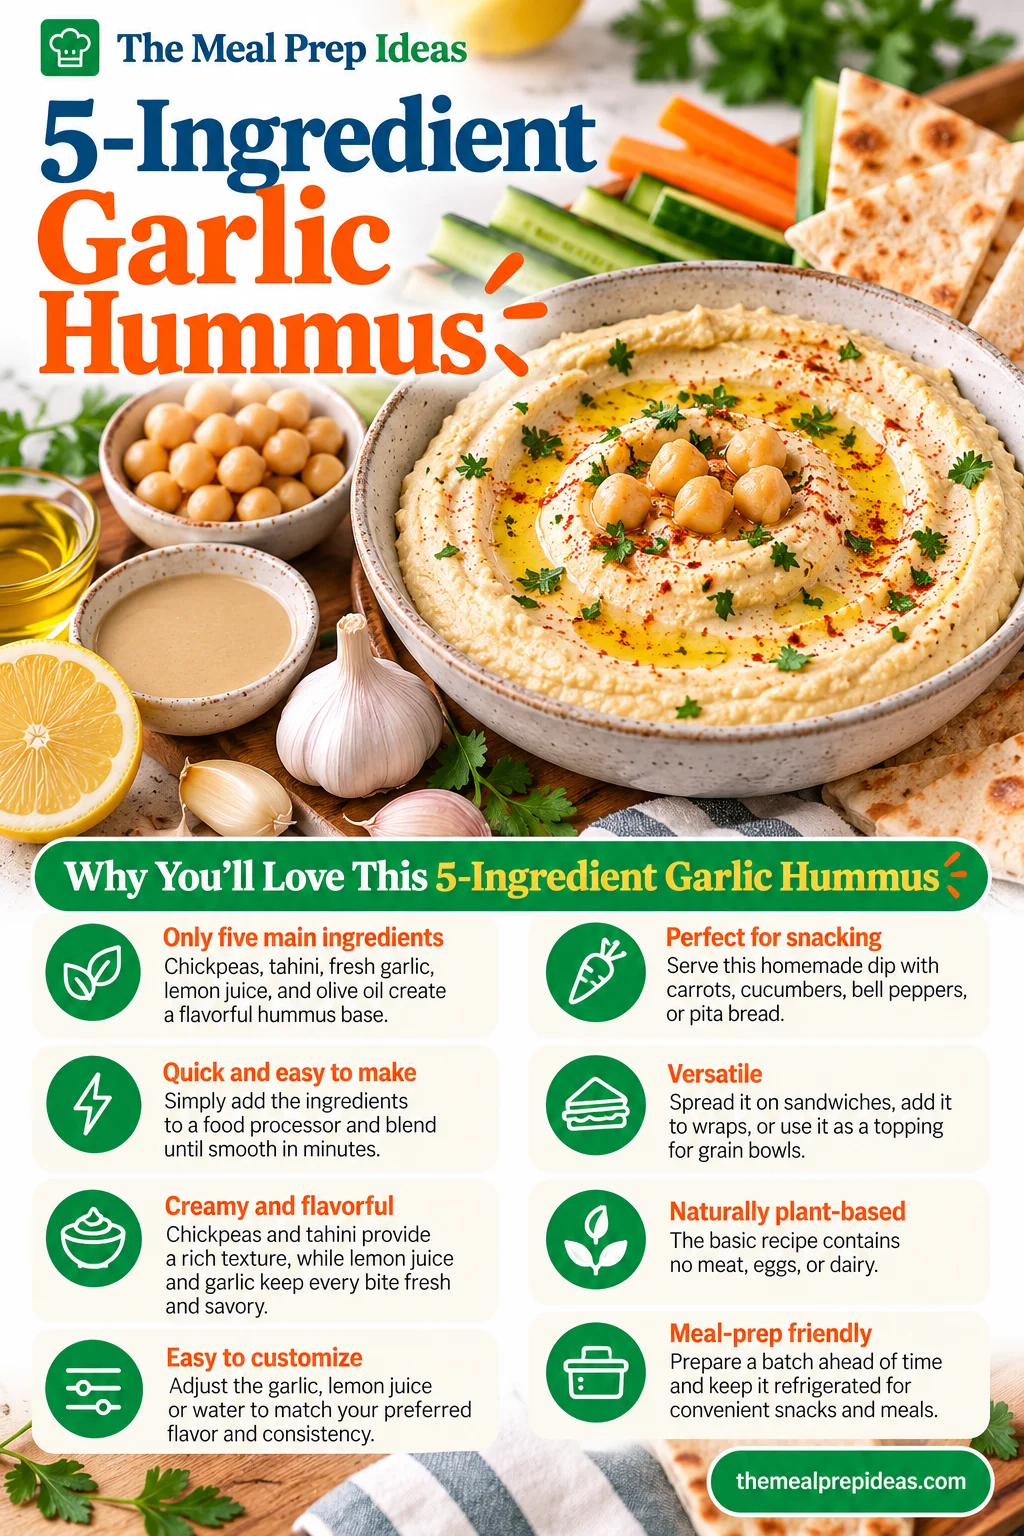
5-Ingredient Garlic Hummus is a creamy, homemade dip made with chickpeas, tahini, fresh garlic, lemon juice, and olive oil. It takes just 10 minutes to prepare and makes a smooth, savory spread that pairs well with pita bread, fresh vegetables, sandwiches, wraps, and grain bowls.
Fresh garlic gives this hummus a bold, savory flavor, while lemon juice adds a bright, tangy finish. Tahini brings a rich, nutty taste that complements the chickpeas beautifully. With just five main ingredients, 5-Ingredient Garlic Hummus is a simple homemade alternative to store-bought dips and spreads.
You can also use homemade hummus as a flavorful spread in our Loaded Veggie Hummus Wraps for an easy lunch.
Estimated nutrition per serving, based on approximately 8 servings:
These values are estimates and may vary depending on the chickpeas, tahini, olive oil, and serving size used.
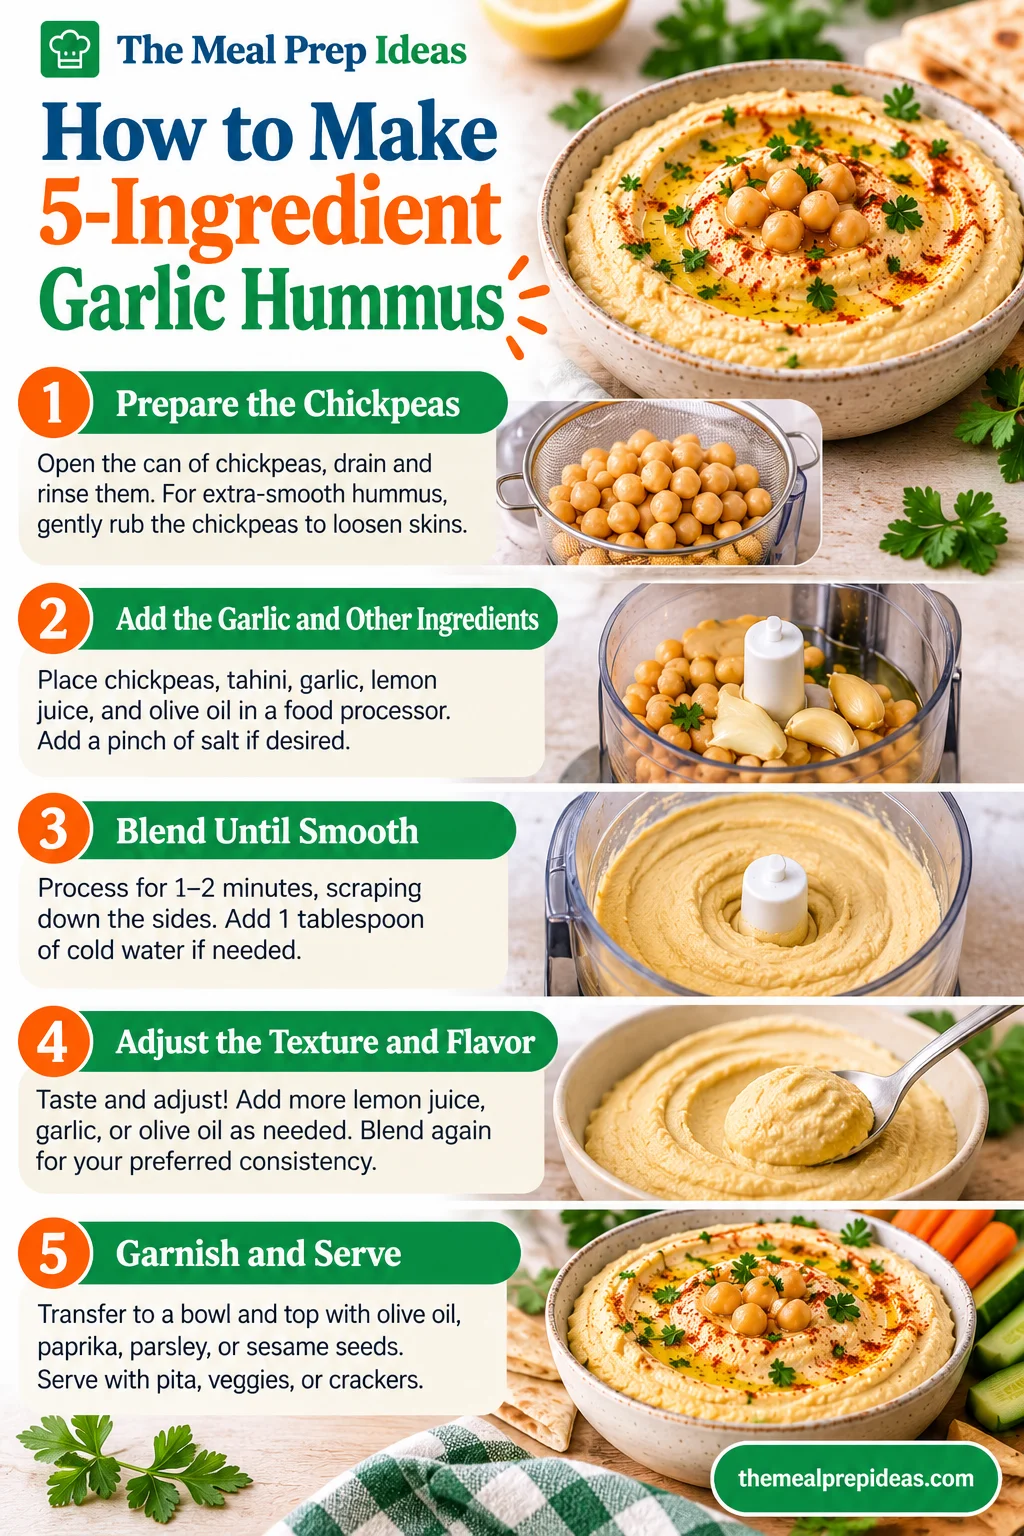
Open the can of chickpeas, drain the liquid, and rinse them thoroughly under cool running water. For extra-smooth hummus, gently rub the chickpeas between your fingers or a clean kitchen towel to loosen some of the thin outer skins. You do not need to remove every skin; even removing a portion can help create a creamier texture. Drain the chickpeas well before adding them to the food processor.
Place the chickpeas, tahini, peeled garlic cloves, fresh lemon juice, and olive oil in the bowl of a food processor. If you are using salt, add a small amount at this stage. You can always adjust the seasoning after blending, so it is best to start with less and add more if needed. Use fresh garlic without green shoots whenever possible, as sprouted garlic can sometimes have a stronger or more bitter flavor.
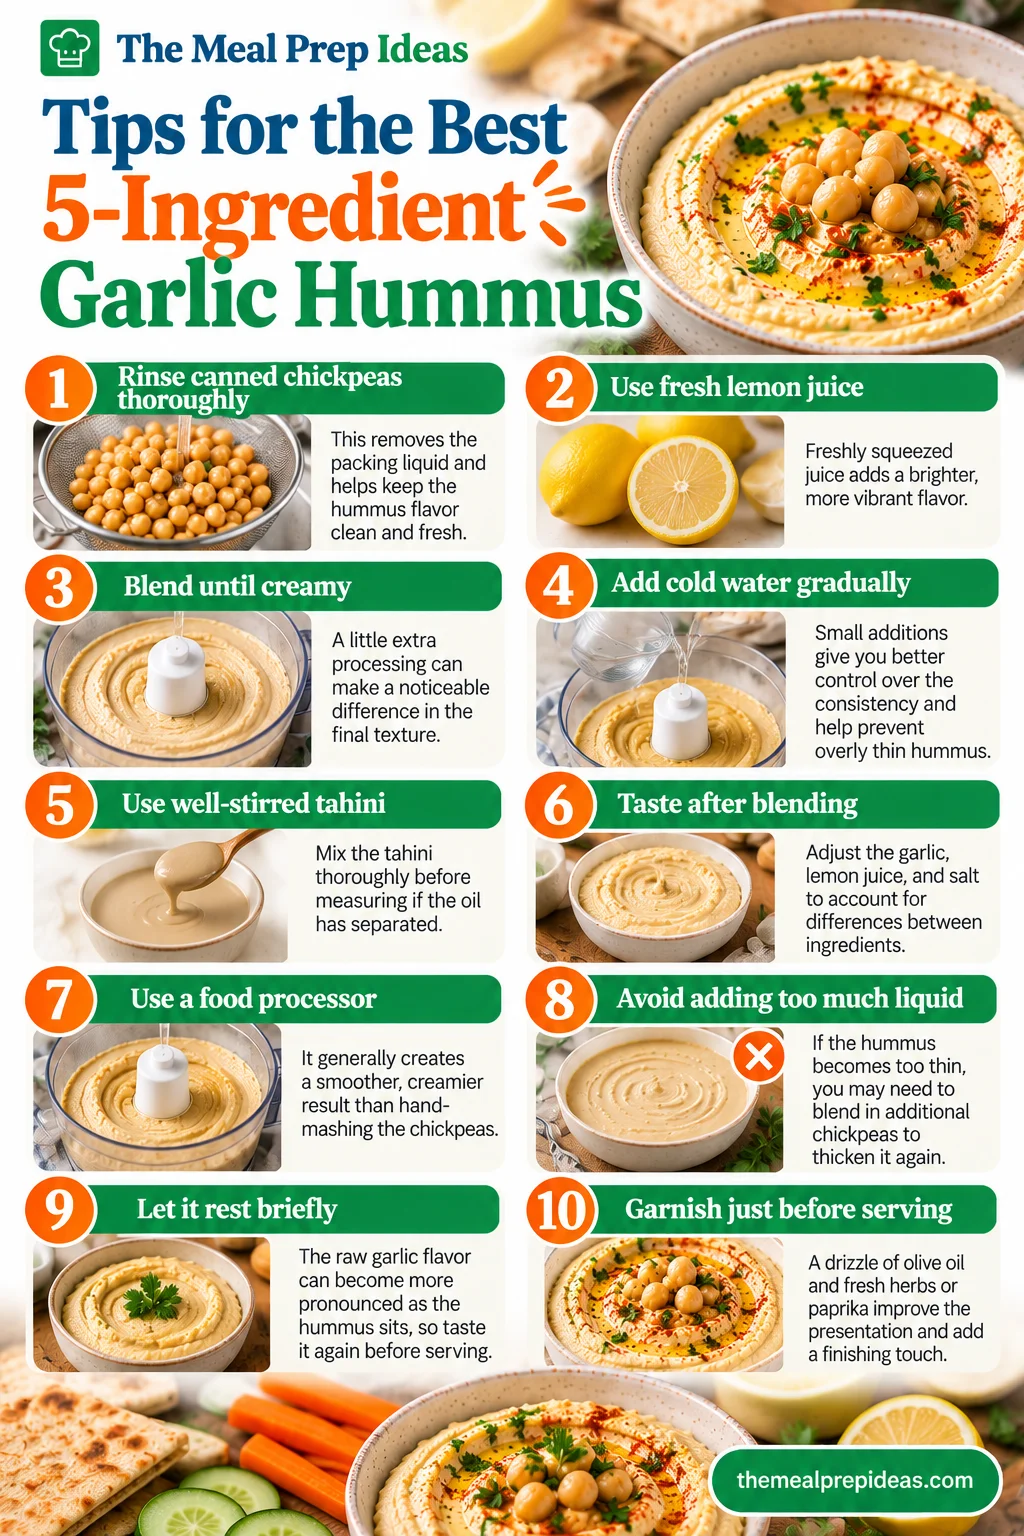
Process the ingredients for 1–2 minutes, stopping once or twice to scrape down the sides of the food processor. The mixture may initially look thick and slightly grainy. Continue blending until the chickpeas are finely processed and the hummus becomes creamy. If the food processor struggles or the mixture is too thick, add 1 tablespoon of cold water and continue blending. Repeat only as needed to reach your desired consistency.
Once the hummus is smooth, taste it and adjust the flavor to your preference. Add another teaspoon of lemon juice for extra brightness or a small amount of finely minced garlic for a stronger garlic flavor. Blend again after making any additions. For thinner hummus, gradually add cold water until the consistency is right. If you prefer a richer texture, add a small drizzle of olive oil. Taste for salt at the end and adjust carefully. The amount needed may vary depending on the chickpeas and tahini you use.
Spoon the hummus into a shallow serving bowl. If desired, use the back of a spoon to create a small swirl across the surface. Finish with a drizzle of olive oil and your choice of chopped parsley, a light sprinkle of paprika, sesame seeds, or a few whole chickpeas. Serve your homemade garlic hummus with warm pita bread, sliced cucumbers, carrots, bell peppers, or crackers. You can also spread it on sandwiches and wraps for an easy, flavorful addition to lunch.
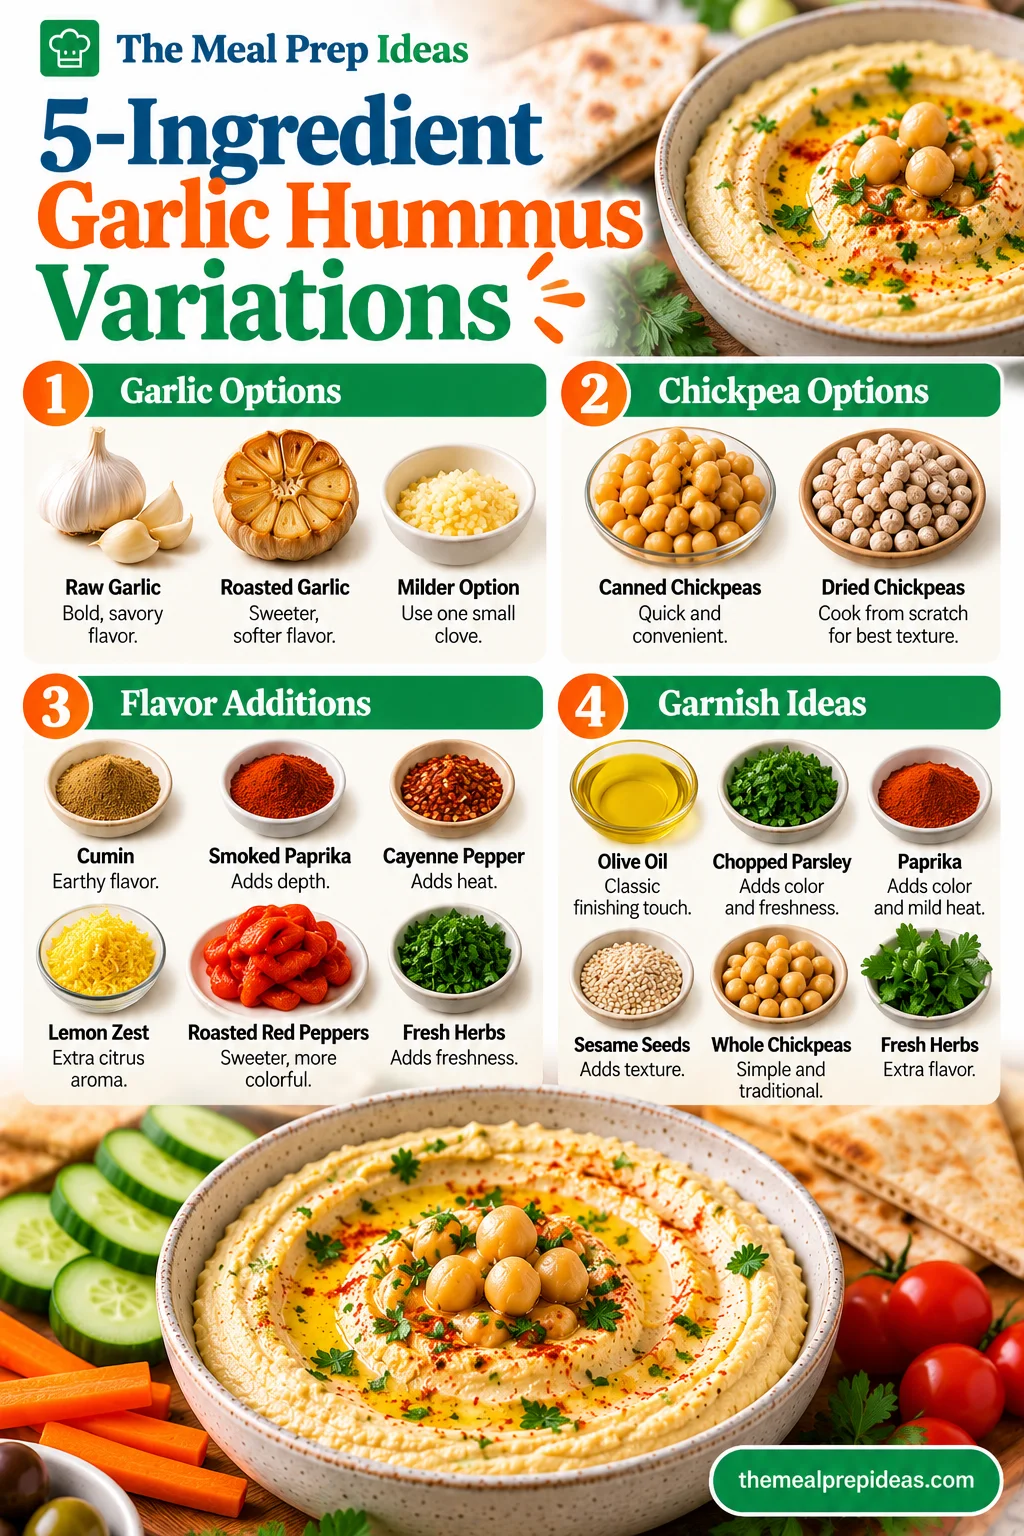
Fresh, raw garlic gives hummus its characteristic savory flavor. Start with two garlic cloves and increase the amount gradually if you prefer a bolder taste. For a milder version, use one small clove. You can also use roasted garlic for a sweeter, softer flavor, although this changes the recipe from the basic five-ingredient version.
Canned chickpeas make this recipe quick and convenient because they are already cooked. Alternatively, you can cook dried chickpeas from scratch and allow them to cool before blending. For the smoothest hummus texture, cook homemade chickpeas until they are very tender and easy to mash between your fingers.
You can customize 5-Ingredient Garlic Hummus with small additions such as ground cumin, smoked paprika, cayenne pepper, or fresh herbs. A little lemon zest adds extra citrus aroma, while roasted red peppers create a sweeter, more colorful variation. Keep in mind that these extras turn the recipe into a flavored hummus rather than the original five-ingredient version.
A simple drizzle of extra-virgin olive oil is a classic finishing touch. Chopped parsley, paprika, sesame seeds, whole chickpeas, or fresh herbs can add color, texture, and extra flavor. For a more substantial appetizer spread, serve the hummus with cucumber slices, cherry tomatoes, olives, pita wedges, and an assortment of fresh vegetables. For another chickpea-based meal with fresh Mediterranean flavors, try our Mediterranean Chickpea Salad.
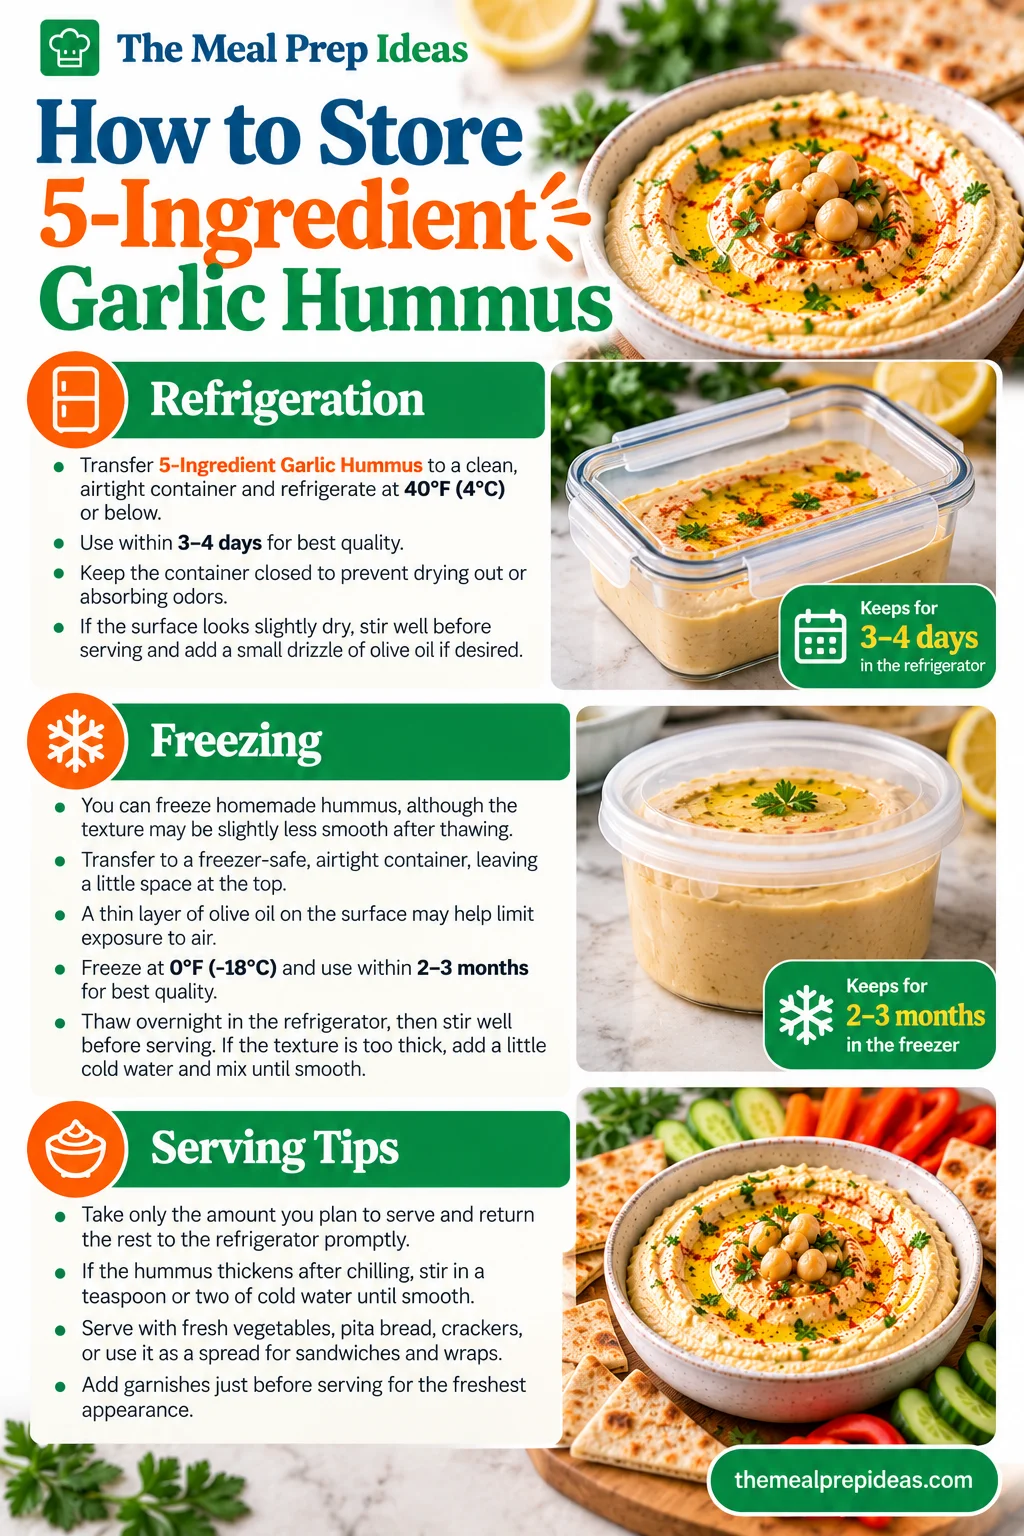
Transfer 5-Ingredient Garlic Hummus to a clean, airtight container and refrigerate it at 40°F (4°C) or below. For best quality, use it within 3–4 days. Keep the container closed when you are not serving the hummus to help prevent it from drying out or absorbing refrigerator odors. If the surface looks slightly dry after refrigeration, stir the hummus well before serving. Add a small drizzle of olive oil if desired.
You can freeze homemade hummus, although its texture may become slightly less smooth after thawing. Transfer the hummus to a freezer-safe, airtight container, leaving a little space at the top for expansion. A thin layer of olive oil on the surface may help limit exposure to air. Freeze at 0°F (-18°C) and use within 2–3 months for best quality. Thaw overnight in the refrigerator, then stir thoroughly before serving. If the texture seems too thick, add a little cold water and mix until smooth.
Take only the amount you plan to serve from the refrigerated container and return the remaining hummus to the refrigerator promptly. If the hummus thickens after chilling, stir in a teaspoon or two of cold water until it reaches your preferred consistency. Serve it with fresh vegetables, pita bread, or crackers, or use it as a spread for sandwiches and wraps. Add garnishes just before serving for the freshest appearance. For a convenient lunch with easy-to-pack snack options, pair your favorite dips and sides with our Homemade Lunchable.
Yes! Canned chickpeas are a convenient choice because they are already cooked and ready to blend. Drain and rinse them thoroughly before adding them to the food processor. For a smoother texture, remove some or all of the chickpea skins before blending.
Use very tender chickpeas, remove the skins if desired, and blend the ingredients thoroughly in a food processor. Add cold water gradually while blending until the mixture becomes creamy. Well-stirred tahini also helps create a consistent texture.
Yes, although tahini provides the nutty flavor and creamy texture associated with traditional hummus. If you do not have tahini, blend the chickpeas with olive oil, lemon juice, and garlic, then adjust the water and seasoning until you reach your preferred consistency. The result will taste slightly different from traditional hummus.
The ideal garlic flavor depends on your preference. Two fresh garlic cloves provide a noticeable, savory flavor in this recipe. If you prefer milder hummus, start with one small clove and add more if needed. Remember that raw garlic can become more pronounced as the hummus rests.
Homemade garlic hummus generally keeps for 3–4 days when stored in a clean, airtight container at 40°F (4°C) or below. Use clean utensils when serving and refrigerate leftovers promptly.
Make creamy 5-Ingredient Garlic Hummus in just 10 minutes with chickpeas, tahini, fresh garlic, lemon juice, and olive oil.
the mealGood to know
Made this recipe?
Tag @themealprepideas on Instagram — we love seeing what you made.
Be the first to rate, review, or ask a question about this recipe.
No comments yet
Be the first cook to share feedback or ask a question about this recipe!
Keep Cooking
Make easy Peanut Butter Oat Energy Bites with oats, peanut butter, honey, and chia seeds. A chewy, no-bake snack ready in 40 minutes.

Make easy No-Bake Trail Mix Bars with oats, nuts, seeds, dried fruit, peanut butter, and honey. A chewy, crunchy snack for meal prep.

Make easy Peanut Butter Granola Bars with oats, honey, peanut butter, seeds, and dried fruit. These chewy no-bake bars are perfect for meal prep.
Join 50,000+ subscribers getting weekly meal prep ideas, shopping lists, and time-saving tips straight to their inbox.