Meal Prep Ideas
Back to Home Page

Mini Banana Muffins

Make soft and moist Mini Banana Muffins with ripe bananas and simple ingredients. Perfect for breakfast, snacks, and meal prep.

Homemade vanilla muffins in white paper liners arranged on a wooden serving board beside a muffin tin.

Get This Recipe Summarized by AI

Ask your favorite AI assistant to summarize this recipe, suggest swaps, or scale it up — one click away.

We copy the prompt to your clipboard too — just paste (Ctrl/Cmd+V) if it doesn't appear automatically.

Mini Banana Muffins are soft, tender and naturally sweet little treats made with ripe bananas and simple pantry ingredients. They bake quickly and are easy to serve for breakfast, snacks, lunchboxes, or whenever you want a small homemade treat. Their bite-sized portions also make them a convenient way to use up ripe bananas.

These mini muffins are easy to customize with chocolate chips, chopped nuts, or a little cinnamon. They’re also great for meal prep because you can make a batch ahead of time and freeze extras for later.

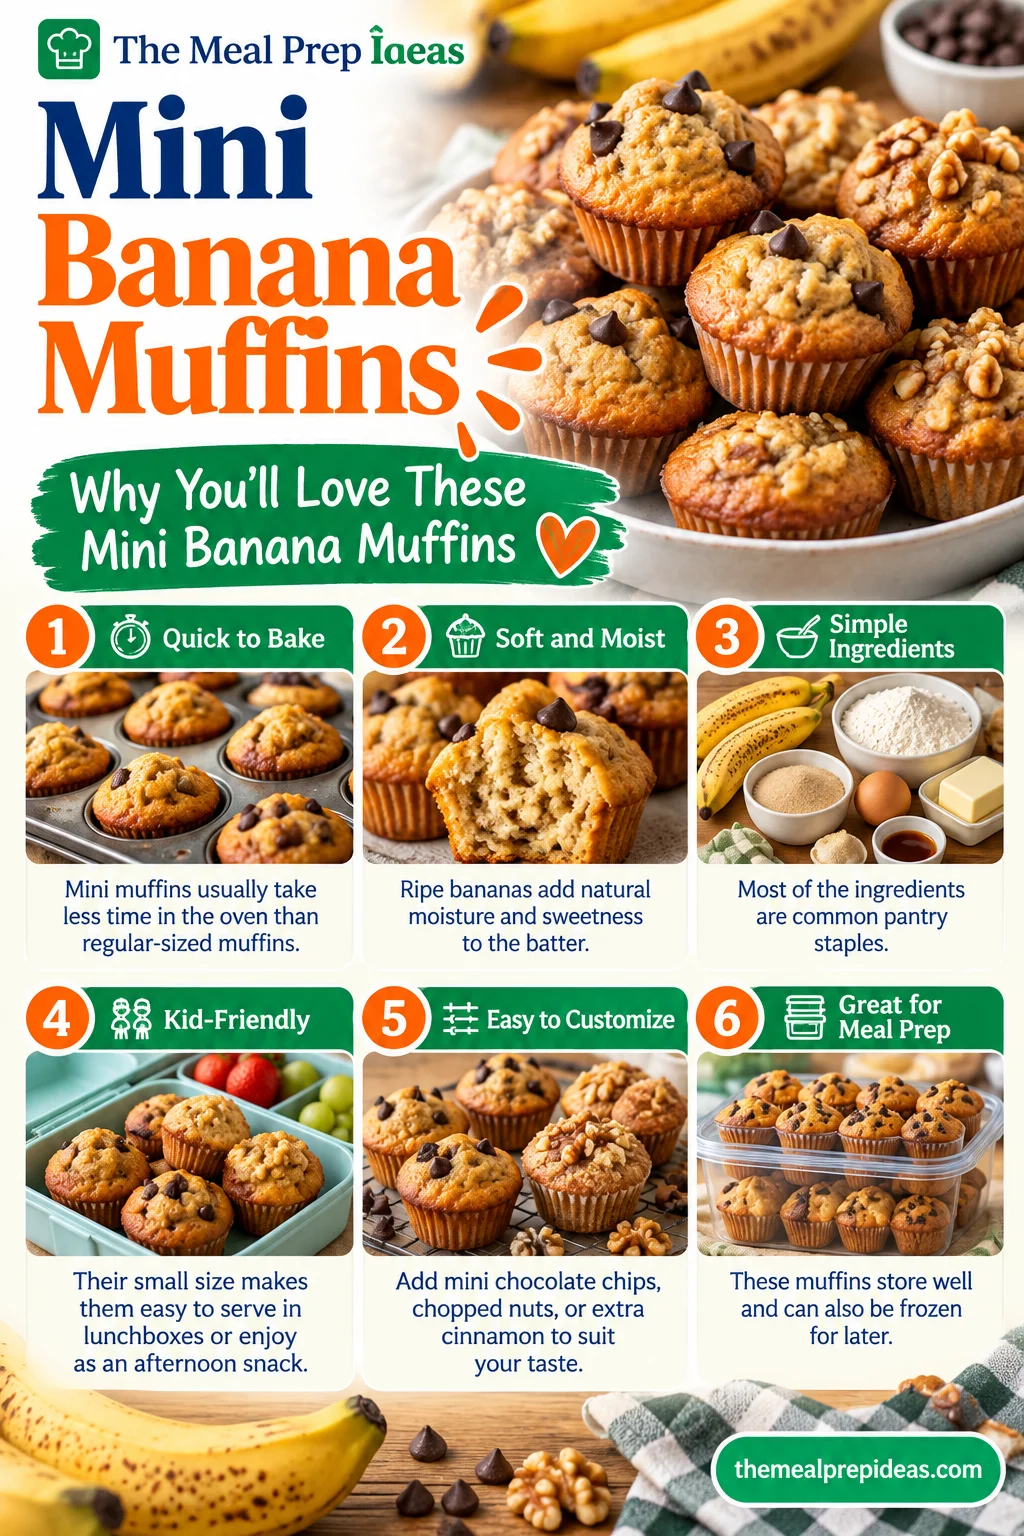
Why You’ll Love These Mini Banana Muffins

  • Quick to bake: Mini muffins usually take less time in the oven than regular-sized muffins.
  • Soft and moist: Ripe bananas add natural moisture and sweetness to the batter.
  • Simple ingredients: Most of the ingredients are common pantry staples.
  • Kid-friendly: Their small size makes them easy to serve in lunchboxes or enjoy as an afternoon snack.
  • Easy to customize: Add mini chocolate chips, chopped nuts, or extra cinnamon to suit your taste.
  • Great for meal prep: These muffins store well and can also be frozen for later.

If you enjoy easy banana breakfasts, try our Banana Chocolate Chip Baked Oatmeal for another make-ahead option with a comforting banana flavor.

Mini Banana Muffins served on a wooden board, with soft golden tops, white paper liners, and a muffin tray on a bright kitchen surface.

Mini Banana Muffins Recipe

Time

  • Prep Time: 10 minutes
  • Cook Time: 10–12 minutes
  • Total Time: 22 minutes
  • Servings: 24 mini muffins

Ingredients

  • 2 medium ripe bananas, mashed
  • 1 large egg
  • ⅓ cup melted unsalted butter
  • ⅓ cup granulated sugar
  • 1 tsp vanilla extract
  • 1 cup all-purpose flour
  • ½ tsp baking soda
  • ½ tsp baking powder
  • ½ tsp ground cinnamon
  • ¼ tsp salt
  • 2 tbsp milk, if needed
  • Optional: ⅓ cup mini chocolate chips or chopped nuts

Instructions

  1. 1Preheat the oven: Preheat the oven to 350°F (175°C). Lightly grease a 24-cup mini muffin pan or line it with mini paper liners.
  2. 2Mash the bananas: In a large bowl, mash the bananas until mostly smooth.
  3. 3Mix the wet ingredients: Whisk in the egg, melted butter, sugar and vanilla extract until combined.
  4. 4Combine the dry ingredients: In a separate bowl, whisk together the flour, baking soda, baking powder, cinnamon and salt.
  5. 5Make the batter: Add the dry ingredients to the banana mixture.
  6. 6Stir gently: Mix until the ingredients are just combined. Avoid overmixing to help keep the muffins tender.
  7. 7Adjust the consistency: If the batter seems unusually thick, stir in 1–2 tablespoons of milk.
  8. 8Add optional mix-ins: Gently fold in the mini chocolate chips or chopped nuts, if using.
  9. 9Fill the muffin pan: Divide the batter evenly among the mini muffin cups, filling each about two-thirds full.
  10. 10Bake: Bake for 10–12 minutes, or until the tops are lightly golden and a toothpick inserted into the center comes out clean or with a few moist crumbs.
  11. 11Cool the muffins: Let the muffins rest in the pan for about 5 minutes, then transfer them to a wire rack.
  12. 12Serve: Enjoy the muffins warm or let them cool completely before storing.

Notes

  • Choose ripe bananas: The sweetness and flavor depend partly on how ripe your bananas are. Bananas with plenty of brown spots generally provide more sweetness and a stronger banana flavor.
  • Avoid overmixing: Once you add the flour, stir only until the ingredients are combined. A few small lumps in the batter are fine and can help keep the muffins tender.
  • Check for doneness early: Mini muffin pans vary slightly in size, so start checking the muffins around the 9-minute mark. Their small size means they can become overbaked quickly.
  • Measure the flour carefully: Too much flour can make the muffins dense or dry. For a more consistent result, spoon the flour into the measuring cup and level off the top.

Nutrition

Approximate nutrition per mini muffin, based on 24 muffins and without optional chocolate chips or nuts:

  • Calories: 95
  • Protein: 1 g
  • Carbohydrates: 13 g
  • Fat: 4 g
  • Fiber: 1 g
  • Sugar: 6 g
  • Sodium: 75 mg

Actual nutrition values may vary depending on banana size, ingredient brands, portion sizes and any optional mix-ins.

Dietary

  • Vegetarian: Suitable for a vegetarian diet.
  • Dairy-Free: Use dairy-free butter and plant-based milk.
  • Gluten-Free: Use a suitable 1-to-1 gluten-free flour blend.
  • Egg-Free: A suitable egg replacer can be used, although the texture may change slightly.
  • Lower-Sugar: Reduce the added sugar slightly when using very ripe bananas, keeping in mind that the sweetness and texture may change.
  • Nut-Free: Leave out the nuts and use nut-free chocolate chips if adding chocolate.

For allergy-friendly baking, check packaged ingredients for potential allergens and cross-contact information.

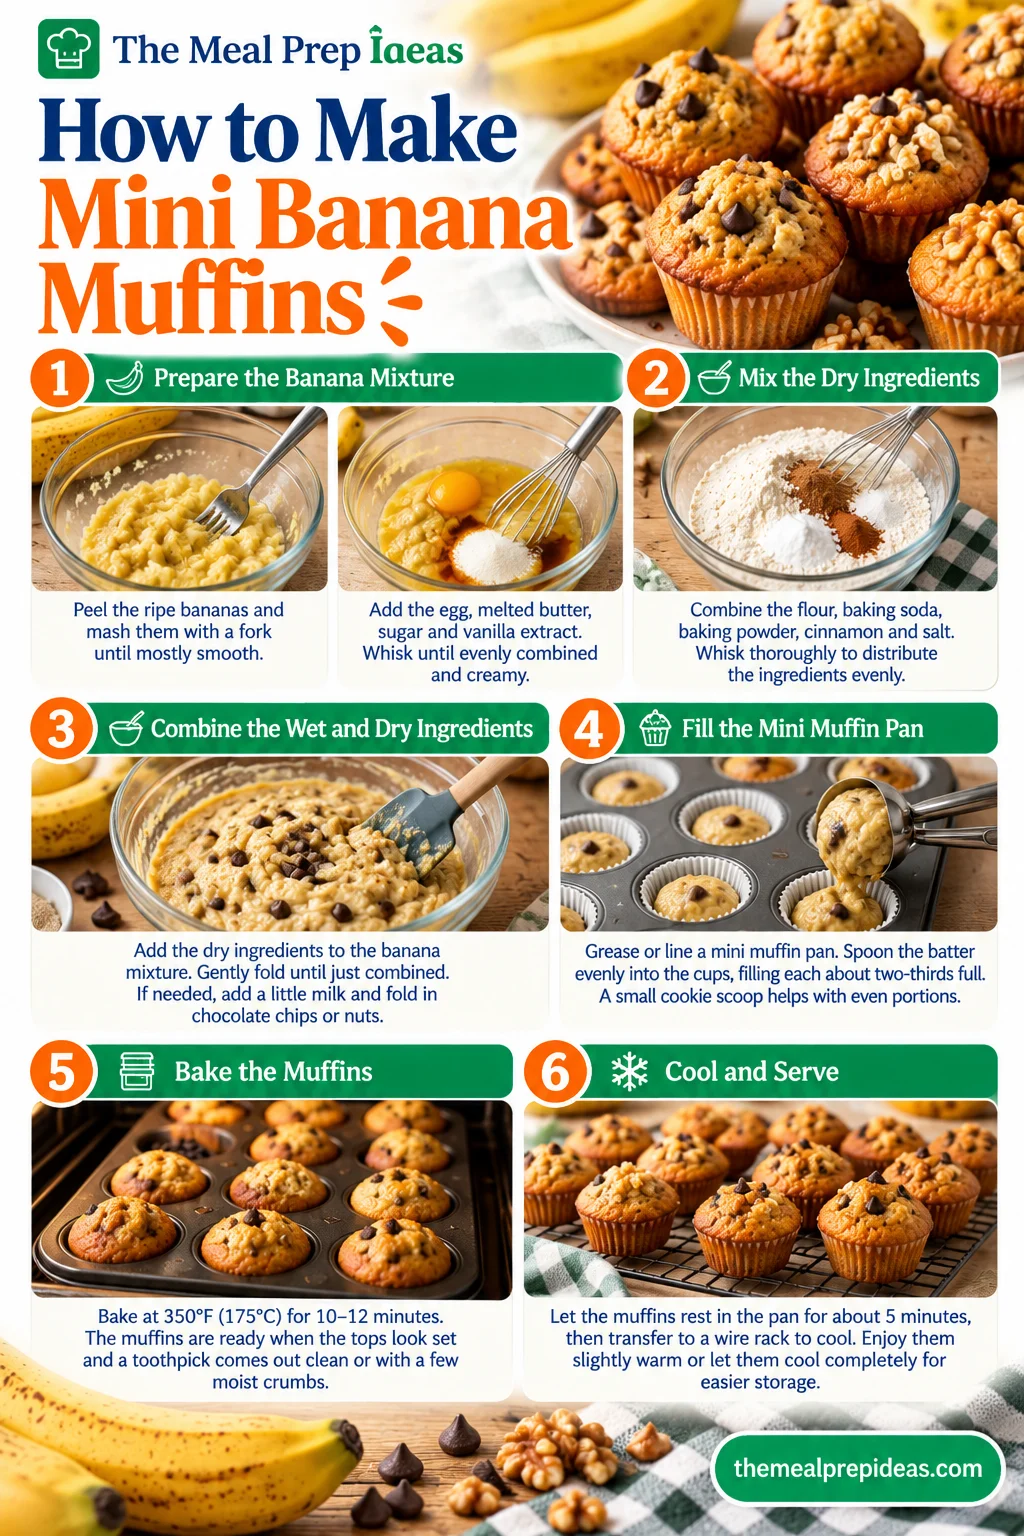
How to Make Mini Banana Muffins

Prepare the Banana Mixture

Peel the ripe bananas and place them in a large mixing bowl. Mash them with a fork until they are mostly smooth. Add the egg, melted butter, sugar and vanilla extract. Whisk until the ingredients are evenly combined and the mixture looks creamy.

Mix the Dry Ingredients

In a separate bowl, combine the flour, baking soda, baking powder, cinnamon and salt. Whisk the dry ingredients thoroughly so the leavening agents and cinnamon are evenly distributed throughout the flour. This helps the muffins bake more consistently.

Combine the Wet and Dry Ingredients

Add the dry mixture to the bowl with the banana mixture. Gently fold everything together using a spatula or wooden spoon. Stop mixing as soon as there are no obvious streaks of dry flour. Overmixing can make the muffins dense instead of soft and tender. If the batter seems unusually thick, add a small amount of milk. Fold in chocolate chips or chopped nuts at this stage if desired.

Fill the Mini Muffin Pan

Grease a mini muffin pan or line it with mini muffin liners. Spoon the batter evenly into the cups, filling each about two-thirds full. Using a small cookie scoop makes it easier to portion the batter evenly, helping the muffins bake at a similar rate.

Bake the Muffins

Place the pan in a preheated 350°F (175°C) oven. Bake for approximately 10–12 minutes. The muffins are ready when the tops look set and a toothpick inserted into the center comes out clean or with a few moist crumbs. Since mini muffins bake quickly, check them toward the beginning of the baking window to prevent overbaking.

Cool and Serve

Let the mini muffins rest in the pan for about 5 minutes. Carefully transfer them to a wire rack to finish cooling. They are delicious slightly warm, but allowing them to cool completely makes them easier to store and pack for later.

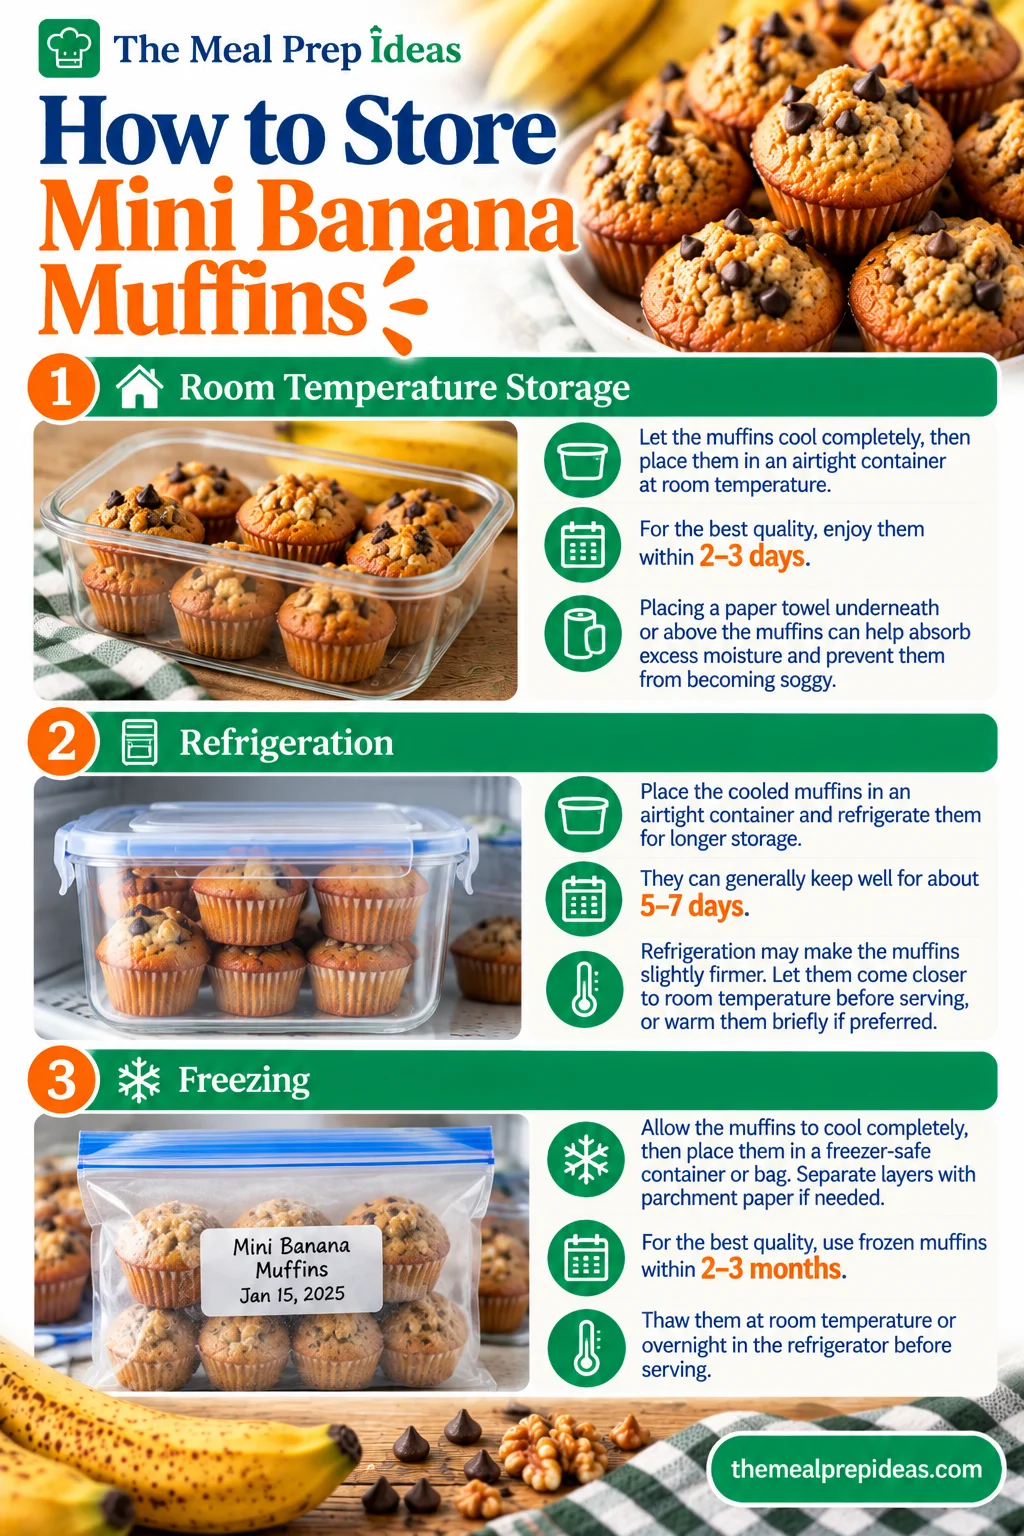
Mini muffins stored in airtight containers and freezer bags, illustrating room-temperature storage, refrigeration, and freezing tips.

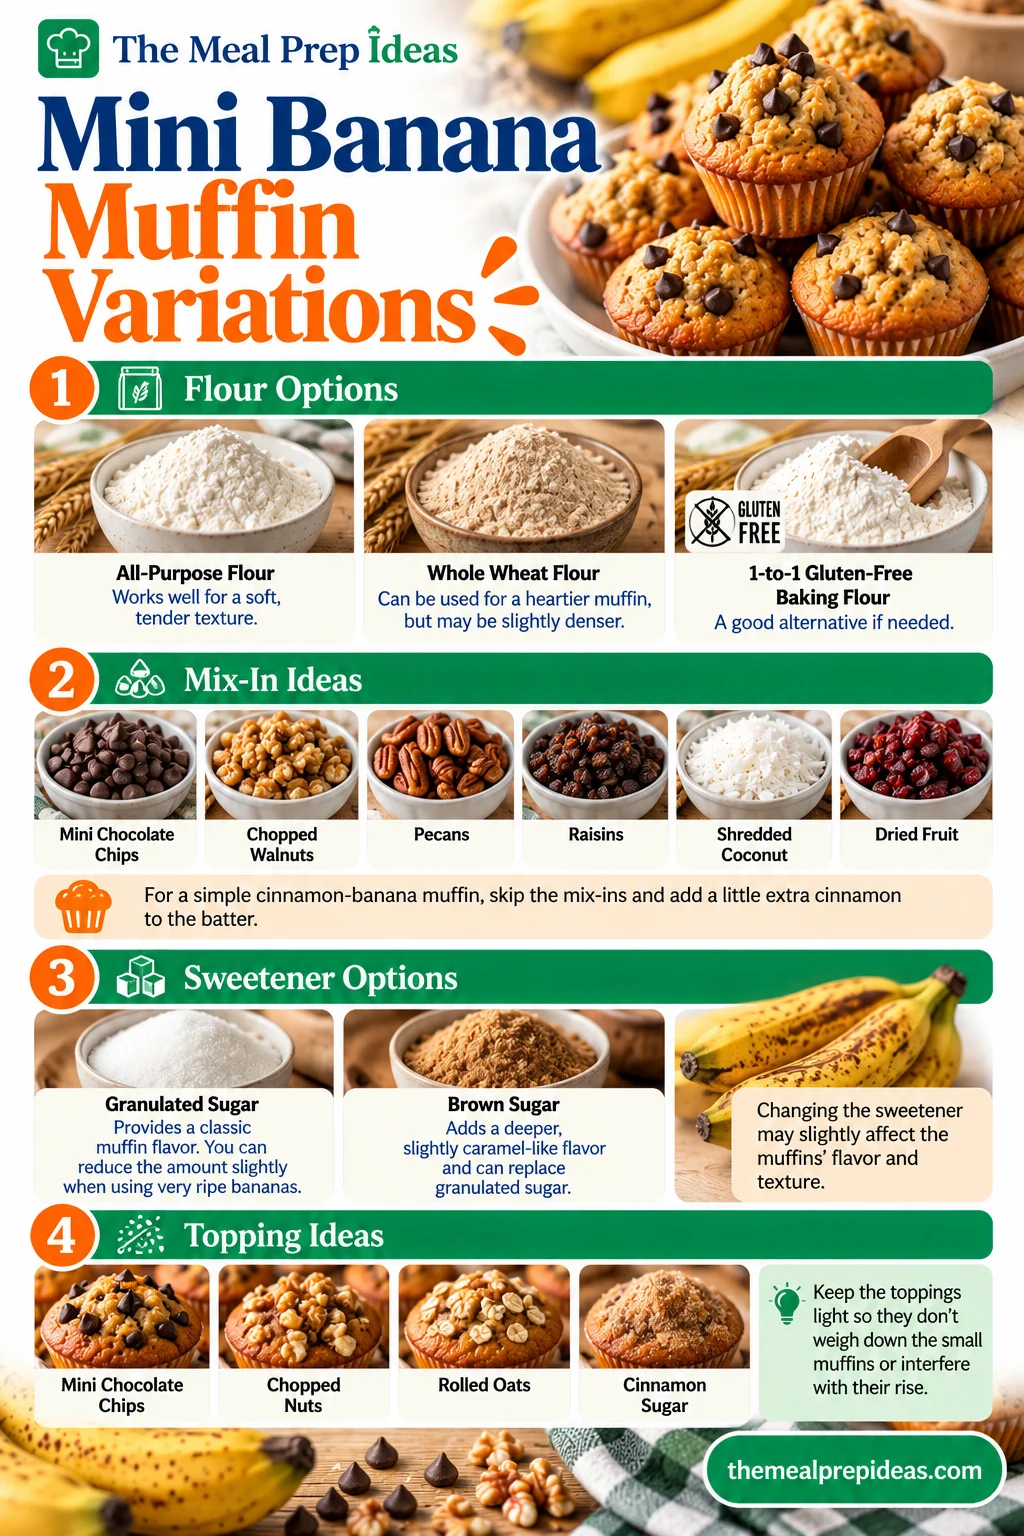
Mini Banana Muffin Variations

Flour Options

All-purpose flour works well for a soft, tender texture. You can replace it with a 1-to-1 gluten-free baking flour if needed. Whole wheat flour can also be used for a heartier muffin, although it may produce a slightly denser texture.

Mix-In Ideas

Add mini chocolate chips, chopped walnuts, pecans, raisins, shredded coconut, or finely chopped dried fruit to customize the flavor and texture. For a simple cinnamon-banana muffin, skip the mix-ins and add a little extra cinnamon to the batter.

Sweetener Options

Granulated sugar provides a classic muffin flavor, but you can reduce the amount slightly when using very ripe bananas. Brown sugar can also replace granulated sugar for a deeper, slightly caramel-like flavor. Keep in mind that changing the sweetener may slightly affect the muffins' flavor and texture.

Topping Ideas

Before baking, sprinkle the tops with a few mini chocolate chips, chopped nuts, rolled oats, or a light dusting of cinnamon sugar. Keep the toppings light so they don't weigh down the small muffins or interfere with their rise. For another easy, portion-sized breakfast to prepare ahead, try our Mini Baked Egg Cups, a savory option to pair with your breakfast routine.

Mini Banana Muffin variations with chocolate chips, chopped nuts, cinnamon, and different flour and sweetener options.

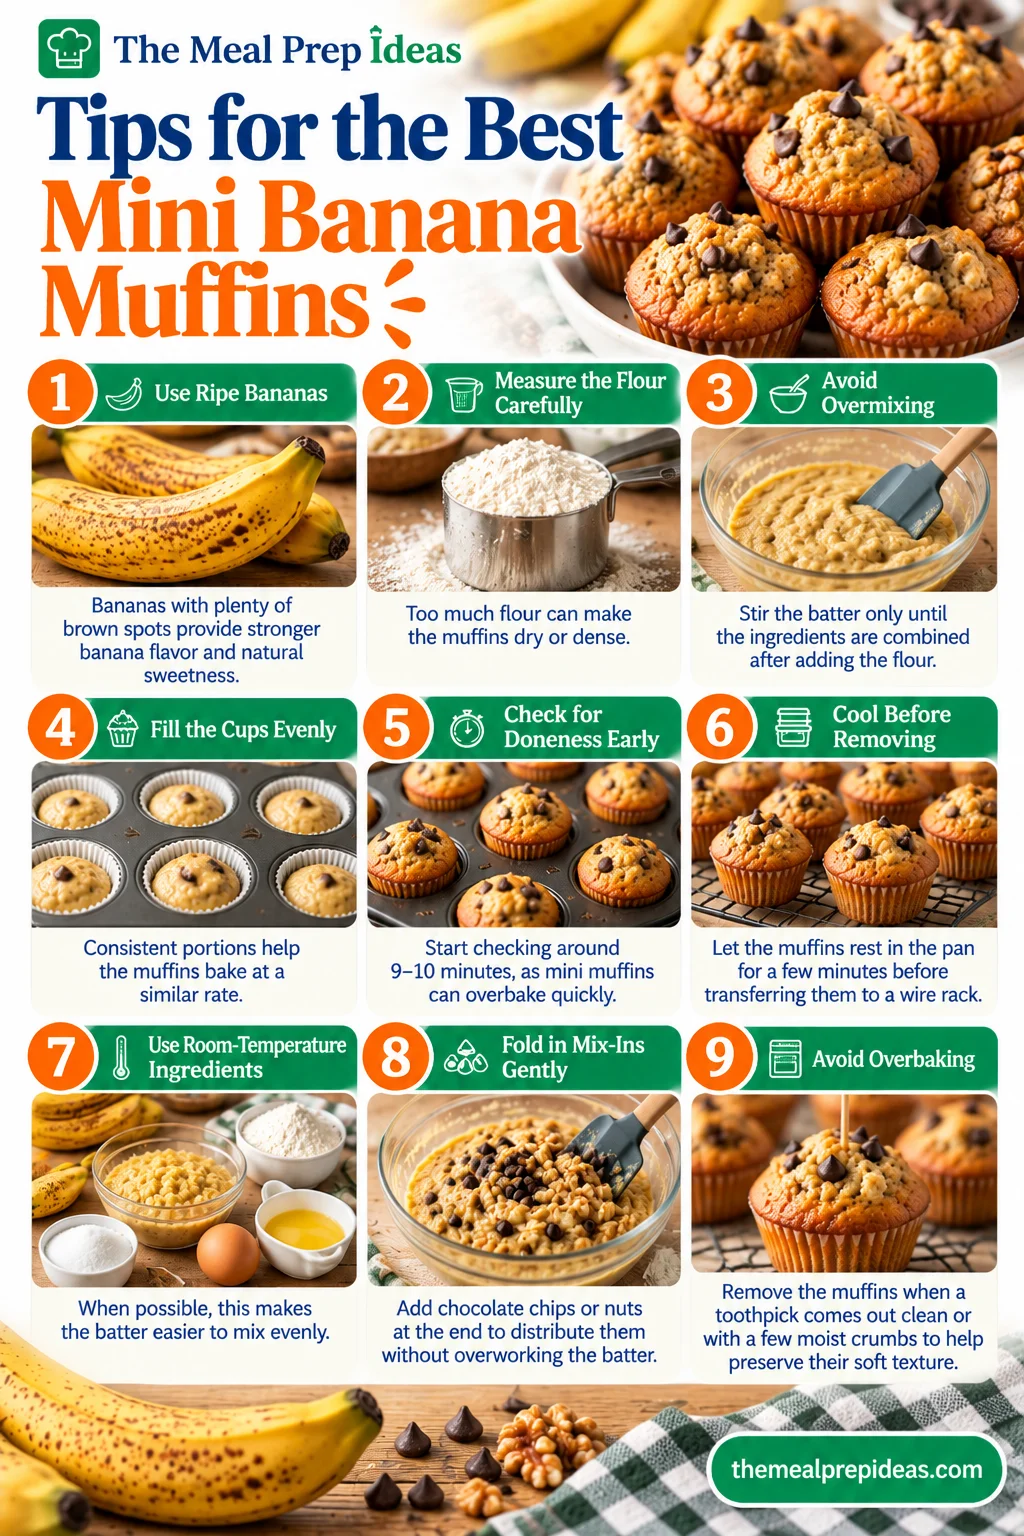
Tips for the Best Mini Banana Muffins

  • Use ripe bananas: Bananas with plenty of brown spots provide stronger banana flavor and natural sweetness.
  • Measure the flour carefully: Too much flour can make the muffins dry or dense.
  • Avoid overmixing: Stir the batter only until the ingredients are combined after adding the flour.
  • Fill the cups evenly: Consistent portions help the muffins bake at a similar rate.
  • Check for doneness early: Start checking around 9–10 minutes, as mini muffins can overbake quickly.
  • Cool before removing: Let the muffins rest in the pan for a few minutes before transferring them to a wire rack.
  • Use room-temperature ingredients: When possible, this makes the batter easier to mix evenly.
  • Fold in mix-ins gently: Add chocolate chips or nuts at the end to distribute them without overworking the batter.
  • Avoid overbaking: Remove the muffins when a toothpick comes out clean or with a few moist crumbs to help preserve their soft texture.
Mini Banana Muffins baking tips infographic featuring ripe bananas, flour measurement, mixing batter, filling muffin cups, and checking doneness.

How to Store Mini Banana Muffins

Room Temperature Storage

Once the muffins have cooled completely, place them in an airtight container and keep them at room temperature. For the best quality, enjoy them within 2–3 days. Placing a paper towel underneath or above the muffins can help absorb excess moisture and prevent them from becoming soggy.

Refrigeration

For longer storage, place the cooled muffins in an airtight container and refrigerate them. They can generally keep well for about 5–7 days, although refrigeration may make the muffins slightly firmer. Let them come closer to room temperature before serving, or warm them briefly if preferred.

Freezing

Allow the muffins to cool completely before freezing. Place them in a freezer-safe container or bag, separating layers with parchment paper if needed. For the best quality, use frozen muffins within 2–3 months. Thaw them at room temperature or overnight in the refrigerator before serving. For another make-ahead snack that doesn't require baking, try our Peanut Butter Oat Energy Bites for easy grab-and-go portions.

Mini muffins stored in airtight containers and freezer bags, illustrating room-temperature storage, refrigeration, and freezing tips.

Frequently Asked Questions

How Ripe Should Bananas Be for Mini Muffins?

The best bananas are very ripe, with plenty of brown spots on the peel. They are softer, sweeter and have a stronger banana flavor, making them ideal for muffins.

Can I Make These Muffins with Frozen Bananas?

Yes. Thaw the frozen bananas completely before using them and drain off any large amount of excess liquid. Mash them well before adding them to the batter.

Frozen and thawed bananas can be softer and more watery than fresh bananas, so avoid adding extra milk unless the batter actually needs it.

How Do I Keep Mini Banana Muffins Moist?

Use ripe bananas, measure the flour carefully and avoid overbaking the muffins. Once the flour is added, mix only until the ingredients are combined.

Storing the cooled muffins in an airtight container also helps preserve their moisture.

Can I Add Chocolate Chips or Nuts?

Yes. Mini chocolate chips, walnuts and pecans all work especially well with banana muffins. Add about ⅓ cup of your chosen mix-in and fold it gently into the finished batter.

How Long Do Mini Banana Muffins Stay Fresh?

At room temperature, they are best within 2–3 days when stored in an airtight container. Refrigerated muffins can generally last about 5–7 days, while frozen muffins are best used within 2–3 months for quality.

No ratings yet

Mini Banana Muffins

Make soft and moist Mini Banana Muffins with ripe bananas and simple ingredients. Perfect for breakfast, snacks, and meal prep.

Homemade vanilla muffins in white paper liners arranged on a wooden serving board beside a muffin tin.the meal
prep ideas
10 minPrep
10 minCook
20 minTotal
Makes 24Servings
Print recipe

Ingredients

0 of 12 gathered

How to prepare

  1. 1Preheat the oven: Preheat the oven to 350°F (175°C). Lightly grease a 24-cup mini muffin pan or line it with mini paper liners.
  2. 2Mash the bananas: In a large bowl, mash the bananas until mostly smooth.
  3. 3Mix the wet ingredients: Whisk in the egg, melted butter, sugar and vanilla extract until combined.
  4. 4Combine the dry ingredients: In a separate bowl, whisk together the flour, baking soda, baking powder, cinnamon and salt.
  5. 5Make the batter: Add the dry ingredients to the banana mixture.
  6. 6Stir gently: Mix until the ingredients are just combined. Avoid overmixing to help keep the muffins tender.
  7. 7Adjust the consistency: If the batter seems unusually thick, stir in 1–2 tablespoons of milk.
  8. 8Add optional mix-ins: Gently fold in the mini chocolate chips or chopped nuts, if using.
  9. 9Fill the muffin pan: Divide the batter evenly among the mini muffin cups, filling each about two-thirds full.
  10. 10Bake: Bake for 10–12 minutes, or until the tops are lightly golden and a toothpick inserted into the center comes out clean or with a few moist crumbs.
  11. 11Cool the muffins: Let the muffins rest in the pan for about 5 minutes, then transfer them to a wire rack.
  12. 12Serve: Enjoy the muffins warm or let them cool completely before storing.

Good to know

  • Choose ripe bananas: The sweetness and flavor depend partly on how ripe your bananas are. Bananas with plenty of brown spots generally provide more sweetness and a stronger banana flavor.
  • Avoid overmixing: Once you add the flour, stir only until the ingredients are combined. A few small lumps in the batter are fine and can help keep the muffins tender.
  • Check for doneness early: Mini muffin pans vary slightly in size, so start checking the muffins around the 9-minute mark. Their small size means they can become overbaked quickly.
  • Measure the flour carefully: Too much flour can make the muffins dense or dry. For a more consistent result, spoon the flour into the measuring cup and level off the top.
  • All-purpose flour works well for a soft, tender texture. You can replace it with a 1-to-1 gluten-free baking flour if needed. Whole wheat flour can also be used for a heartier muffin, although it may produce a slightly denser texture.
  • Add mini chocolate chips, chopped walnuts, pecans, raisins, shredded coconut, or finely chopped dried fruit to customize the flavor and texture. For a simple cinnamon-banana muffin, skip the mix-ins and add a little extra cinnamon to the batter.
  • Granulated sugar provides a classic muffin flavor, but you can reduce the amount slightly when using very ripe bananas. Brown sugar can also replace granulated sugar for a deeper, slightly caramel-like flavor. Keep in mind that changing the sweetener may slightly affect the muffins' flavor and texture.
  • Before baking, sprinkle the tops with a few mini chocolate chips, chopped nuts, rolled oats, or a light dusting of cinnamon sugar. Keep the toppings light so they don't weigh down the small muffins or interfere with their rise. For another easy, portion-sized breakfast to prepare ahead, try our Mini Baked Egg Cups, a savory option to pair with your breakfast routine.
  • Once the muffins have cooled completely, place them in an airtight container and keep them at room temperature. For the best quality, enjoy them within 2–3 days. Placing a paper towel underneath or above the muffins can help absorb excess moisture and prevent them from becoming soggy.
  • For longer storage, place the cooled muffins in an airtight container and refrigerate them. They can generally keep well for about 5–7 days, although refrigeration may make the muffins slightly firmer. Let them come closer to room temperature before serving, or warm them briefly if preferred.
  • Allow the muffins to cool completely before freezing. Place them in a freezer-safe container or bag, separating layers with parchment paper if needed. For the best quality, use frozen muffins within 2–3 months. Thaw them at room temperature or overnight in the refrigerator before serving. For another make-ahead snack that doesn't require baking, try our Peanut Butter Oat Energy Bites for easy grab-and-go portions.
VegetarianDairy-FreeGluten-FreeEgg-FreeLower-SugarNut-Free

Made this recipe?

Tag @themealprepideas on Instagram — we love seeing what you made.

Tag us

Reviews & Comments

Be the first to rate, review, or ask a question about this recipe.

No comments yet

Be the first cook to share feedback or ask a question about this recipe!

Leave a Review & Rating

Tap to rate

Comments are moderated for community safety. External links are filtered.

Keep Cooking

You Might Also Like

Peanut Butter Oat Energy Bites

Peanut Butter Oat Energy Bites

Make easy Peanut Butter Oat Energy Bites with oats, peanut butter, honey, and chia seeds. A chewy, no-bake snack ready in 40 minutes.

10 min
Get Recipe

No-Bake Trail Mix Bars

No-Bake Trail Mix Bars

Make easy No-Bake Trail Mix Bars with oats, nuts, seeds, dried fruit, peanut butter, and honey. A chewy, crunchy snack for meal prep.

15 min
Get Recipe

Peanut Butter Granola Bars

Peanut Butter Granola Bars

Make easy Peanut Butter Granola Bars with oats, honey, peanut butter, seeds, and dried fruit. These chewy no-bake bars are perfect for meal prep.

15 min
Get Recipe

Get Your Free 7-Day Meal Prep Plan

Join 50,000+ subscribers getting weekly meal prep ideas, shopping lists, and time-saving tips straight to their inbox.

No spam. Unsubscribe anytime.