Meal Prep Ideas
Back to Home Page

Beef Chili

Make this easy beef chili with ground beef, beans, tomatoes, and warming spices. A hearty one-pot meal perfect for family dinners and meal prep!

Bowl of beef chili with ground beef, kidney beans, corn, and crispy tortilla strips, served with bread rolls.

Get This Recipe Summarized by AI

Ask your favorite AI assistant to summarize this recipe, suggest swaps, or scale it up — one click away.

We copy the prompt to your clipboard too — just paste (Ctrl/Cmd+V) if it doesn't appear automatically.

Beef chili is a hearty, comforting dish made with ground beef, beans, tomatoes, and a flavorful blend of spices. It has a rich tomato base, tender beans, and perfectly seasoned beef that come together in one satisfying meal. Whether you're preparing a cozy family dinner, planning meals for the week, or cooking for a gathering, homemade beef chili is a delicious choice.

This easy beef chili recipe uses simple pantry ingredients and straightforward cooking steps. The beef is browned to build flavor, then simmered with tomatoes, beans, and spices until thick and rich. Serve it with cornbread, rice, or your favorite toppings for a warm and filling meal.

Why You’ll Love This Beef Chili

  • Rich and hearty: Ground beef, beans, and tomatoes create a thick, satisfying chili that's perfect for lunch or dinner.
  • Easy to prepare: The recipe uses simple ingredients and basic cooking techniques, making it suitable for home cooks.
  • One-pot convenience: Everything cooks in one large pot, which means less cleanup after the meal.
  • Full of flavor: Chili powder, cumin, smoked paprika, and garlic give the dish a warm, savory taste.
  • Easy to customize: Adjust the spice level, choose your preferred beans, or add extra vegetables.
  • Great for meal prep: Beef chili stores well and is convenient to prepare ahead for busy days.
  • Perfect for sharing: It makes a generous batch that works well for family dinners, casual gatherings, and game-day meals.

If you prefer a meatless option, our Vegetarian Chili is another hearty one-pot meal packed with beans, vegetables, and rich tomato flavor.
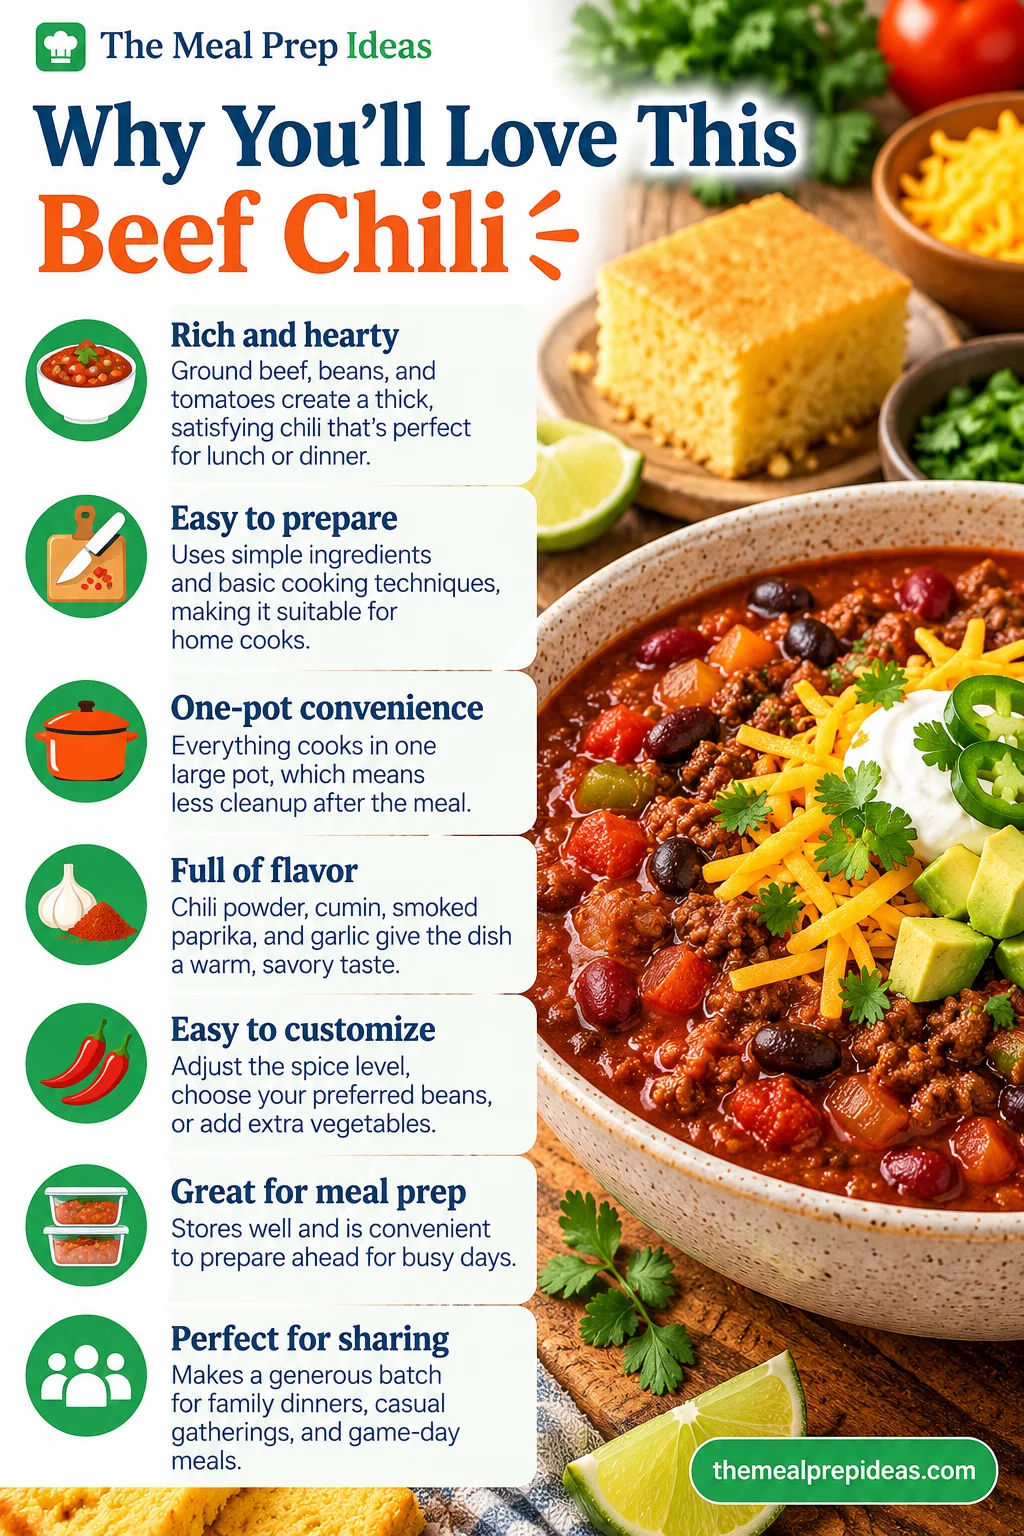
Beef Chili topped with shredded cheddar, sour cream, jalapeños, avocado, and fresh cilantro.

Beef Chili Recipe

Time

  • Prep Time: 15 minutes
  • Cook Time: 50 minutes
  • Total Time: 1 hour 5 minutes
  • Servings: 6

Ingredients

  • 1½ pounds ground beef (80/20 or 85/15)
  • 1 tablespoon olive oil, if needed
  • 1 medium yellow onion, diced
  • 1 red bell pepper, diced
  • 4 cloves garlic, minced
  • 2 tablespoons tomato paste
  • 1 can (28 ounces) crushed tomatoes
  • 1 can (15 ounces) kidney beans, drained and rinsed
  • 1 can (15 ounces) black beans, drained and rinsed
  • 1 cup beef broth
  • 2 tablespoons chili powder
  • 1½ teaspoons ground cumin
  • 1 teaspoon smoked paprika
  • 1 teaspoon dried oregano
  • ½ teaspoon salt, or to taste
  • ½ teaspoon ground black pepper
  • ¼ teaspoon cayenne pepper (optional)
  • 1 teaspoon brown sugar (optional)
  • 1 tablespoon lime juice

Optional toppings:

  • Shredded cheddar cheese
  • Sour cream or plain Greek yogurt
  • Sliced green onions
  • Fresh cilantro
  • Diced avocado
  • Sliced jalapeños
  • Tortilla chips
  • Lime wedges

Instructions

  1. 1Prepare the ingredients: Dice the onion and red bell pepper, mince the garlic, and drain and rinse the canned beans. Measure the spices and keep them ready.
  2. 2Brown the beef: Heat a large Dutch oven or heavy-bottomed pot over medium-high heat. Add the ground beef and cook for 7-9 minutes, breaking it into small pieces with a wooden spoon, until browned and fully cooked. Drain excess fat if necessary.
  3. 3Cook the vegetables: If the pot is dry, add a little olive oil. Add the diced onion and red bell pepper. Cook for 4-5 minutes, stirring occasionally, until softened. Add the minced garlic and cook for another 30-60 seconds.
  4. 4Add tomato paste: Stir in the tomato paste and cook for about 1-2 minutes. This helps develop a deeper, richer flavor.
  5. 5Add tomatoes and beans: Pour in the crushed tomatoes and beef broth. Add the kidney beans and black beans, then stir to combine.
  6. 6Season the chili: Add chili powder, cumin, smoked paprika, oregano, salt, black pepper, and cayenne pepper if using. Add the brown sugar if you prefer a slightly balanced tomato flavor. Mix everything well.
  7. 7Simmer: Bring the mixture to a gentle boil, then reduce the heat to low. Partially cover the pot and simmer for 35-40 minutes, stirring every few minutes to prevent sticking.
  8. 8Adjust the flavor and consistency: Taste the chili and adjust the seasoning as needed. If it is too thin, simmer uncovered for a few additional minutes. If it is too thick, add a little more beef broth.
  9. 9Finish and serve: Stir in the lime juice and remove the pot from the heat. Let the chili rest for about 5 minutes, then serve warm with your preferred toppings.

Notes

  • Choose the right ground beef: Ground beef with around 80/20 or 85/15 fat content gives the chili a rich flavor. If using fattier beef, drain excess grease after browning.
  • Brown the beef properly: Spread the beef across the hot pot and allow it to brown before stirring too often. This helps develop a deeper savory flavor.
  • Adjust the heat: Cayenne pepper is optional. Start with a small amount if you're unsure about the spice level, then adjust to taste.
  • Control the salt: Beef broth and canned tomatoes may already contain sodium. Use low-sodium options if preferred and add salt gradually.
  • Balance the tomatoes: A small amount of brown sugar can soften the acidity of the tomatoes, but it is optional.
  • Let it rest: Resting the chili for a few minutes before serving allows the flavors to settle and the texture to thicken slightly.
  • Use a heavy pot: A Dutch oven or thick-bottomed pot distributes heat more evenly and helps prevent the chili from sticking.
  • Check doneness: Ground beef should reach an internal temperature of 160°F (71°C).

Nutrition

The following nutrition information is an estimate per serving, based on 6 servings and the ingredients listed, without optional toppings. Actual values can vary depending on the fat content of the beef, brands of canned products, and ingredient substitutions.

  • Calories: 460 kcal
  • Protein: 34 g
  • Carbohydrates: 32 g
  • Fat: 22 g
  • Saturated Fat: 8 g
  • Fiber: 9 g
  • Sugar: 9 g
  • Sodium: 780 mg

Beef provides protein, iron, zinc, and vitamin B12, while beans contribute additional protein and dietary fiber. Tomatoes and bell peppers add flavor and provide useful nutrients. Optional toppings will change the final nutritional values.

Dietary

  • Gluten-Free: The main ingredients are naturally gluten-free, but check the labels on beef broth, canned tomatoes, and spice blends to confirm that they contain no gluten-containing additives.
  • Dairy-Free: The chili itself contains no dairy when prepared with the listed ingredients. Avoid cheese, sour cream, and other dairy-based toppings, or use suitable alternatives.
  • Lower-Sodium: Choose no-salt-added canned beans and tomatoes, low-sodium beef broth, and adjust the salt to your taste.
  • Higher-Protein: Use lean ground beef and serve the chili with an additional protein-rich side, if desired. The beans already contribute a substantial amount of protein.
  • Lower-Fat Option: Use lean ground beef, such as 90/10, and drain any excess fat after browning. The finished texture may be slightly less rich.
  • Bean-Free: If you prefer chili without beans, omit them and add extra bell peppers, mushrooms, or diced zucchini. You may need to reduce the broth slightly to maintain a thick consistency.

How to Make Beef Chili

Brown the Beef

Begin by heating a large, heavy-bottomed pot or Dutch oven over medium-high heat. Add the ground beef directly to the hot pot. If you're using very lean beef and the meat begins to stick, add a small amount of olive oil.

Break the beef into small crumbles with a wooden spoon or spatula. Let it cook for 7-9 minutes, stirring occasionally, until it is browned and no longer pink. For the best flavor, allow some of the beef to develop a deep brown color rather than stirring constantly.

If there is a large amount of excess fat in the pot, carefully drain it while keeping the browned beef in place. Return the pot to the heat before continuing with the vegetables. Browning the beef first creates a savory base that gives the finished beef chili its rich taste.

Cook the Aromatics

Add the diced onion and red bell pepper to the pot with the browned beef. Stir well so the vegetables are coated in the flavorful juices left behind by the meat. Cook for about 4-5 minutes, stirring occasionally, until the onion begins to soften and the bell pepper becomes tender. Add the minced garlic and cook for another 30-60 seconds, just until fragrant. Avoid cooking the garlic for too long, as it can burn and develop a bitter flavor. This combination of beef, onion, bell pepper, and garlic builds the aromatic foundation of the chili.

Add the Tomatoes and Beans

Stir the tomato paste into the beef and vegetable mixture. Cook for 1-2 minutes, allowing it to darken slightly and develop a deeper flavor.

Pour in the crushed tomatoes and beef broth. Add the drained and rinsed kidney beans and black beans. Stir everything thoroughly to combine the ingredients and loosen any browned bits from the bottom of the pot.

The crushed tomatoes create the chili's rich base, while the broth helps bring the ingredients together. Beans add texture and make the dish more filling.

If the mixture appears unusually thick at this point, add a little more broth. It will continue to reduce as it simmers, so avoid adding too much liquid at once.
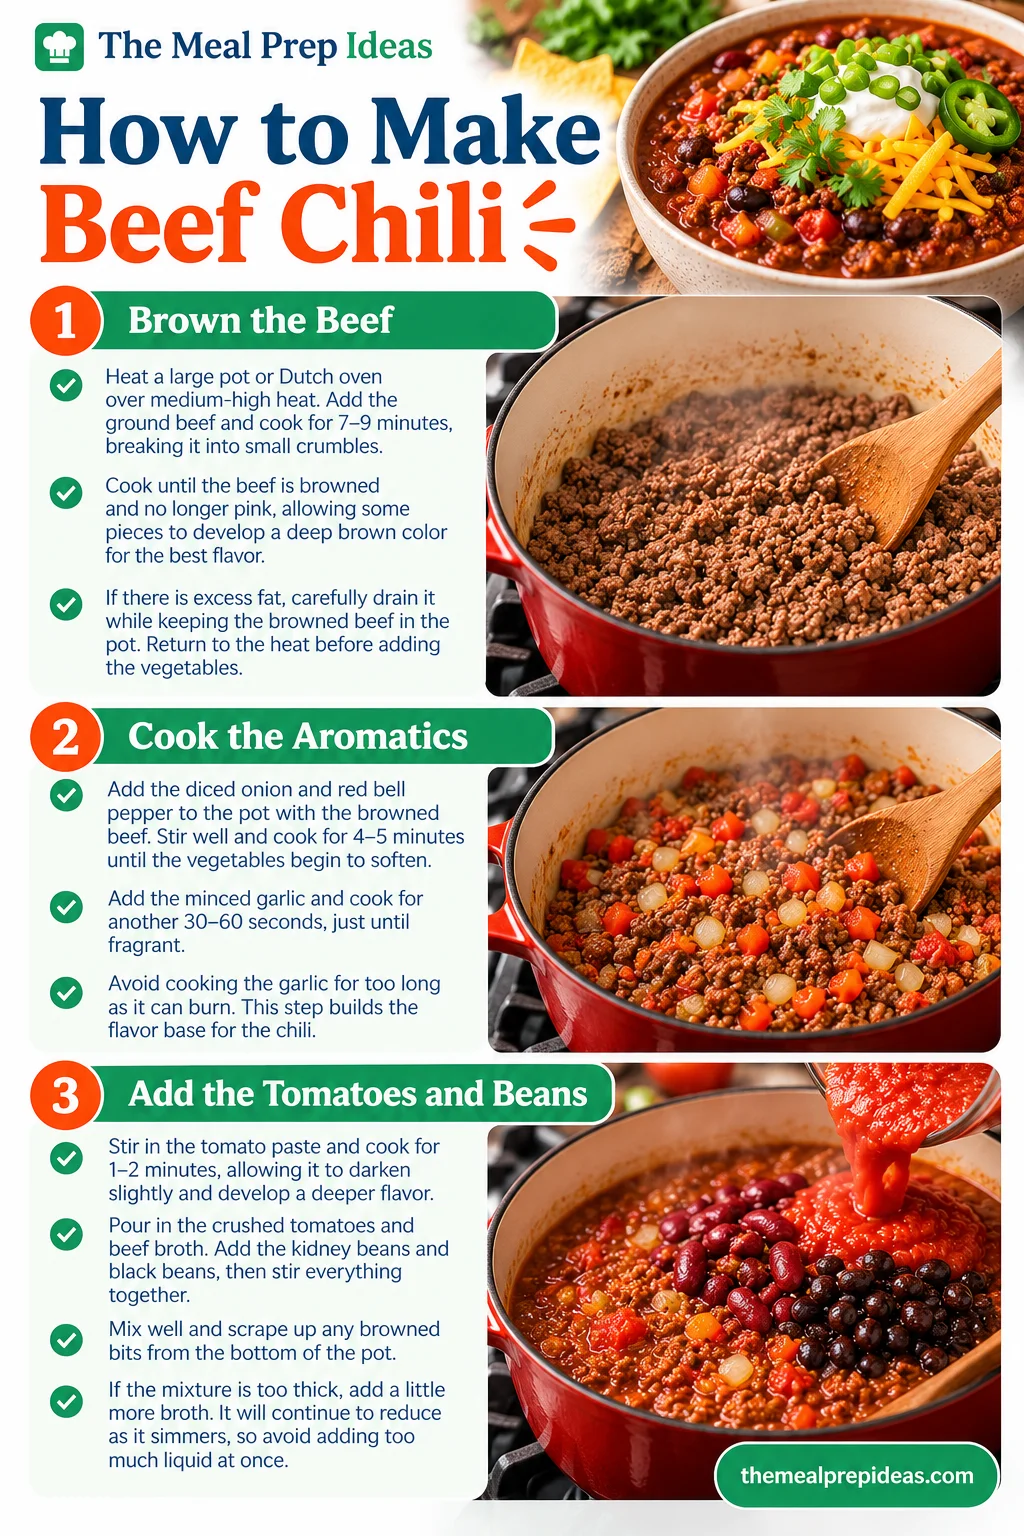
Ground beef browning in a Dutch oven before adding vegetables, tomatoes, beans, and spices.

Season the Chili

Add the chili powder, ground cumin, smoked paprika, dried oregano, salt, black pepper, and optional cayenne pepper to the pot.

Stir until the spices are evenly distributed throughout the mixture. Add a small amount of brown sugar if you want to balance the acidity of the tomatoes.

Let the chili come to a gentle boil, stirring occasionally. Once it begins bubbling, reduce the heat to low. A gentle simmer allows the spices to blend with the beef, beans, and tomato base without cooking the liquid away too quickly.

Taste and adjust the seasoning toward the end of cooking rather than adding large amounts of salt or heat at the beginning.

Simmer Until Thick and Flavorful

Partially cover the pot and let the chili simmer over low heat for 35-40 minutes. Stir it every few minutes, making sure to scrape the bottom and sides of the pot to prevent sticking.

During this time, the beef absorbs the seasoning, the beans soften slightly, and the tomato mixture thickens into a rich, flavorful sauce.

If you prefer a thicker chili, remove the lid during the final 10 minutes of cooking and allow some of the liquid to evaporate. For a thinner consistency, stir in a little additional beef broth.

The chili is ready when the flavors are well combined, the vegetables are tender, and the beef is fully cooked to a safe internal temperature of 160°F (71°C).

Add Toppings and Serve

Once the chili has reached your preferred consistency, stir in the lime juice to brighten the flavor. Turn off the heat and let it rest for about 5 minutes before serving.

Spoon the hot chili into bowls and add toppings such as shredded cheddar cheese, sour cream, sliced green onions, fresh cilantro, diced avocado, or jalapeños.

Serve it with warm cornbread, steamed rice, baked potatoes, or tortilla chips. These sides complement the rich tomato base and make the meal even more satisfying.
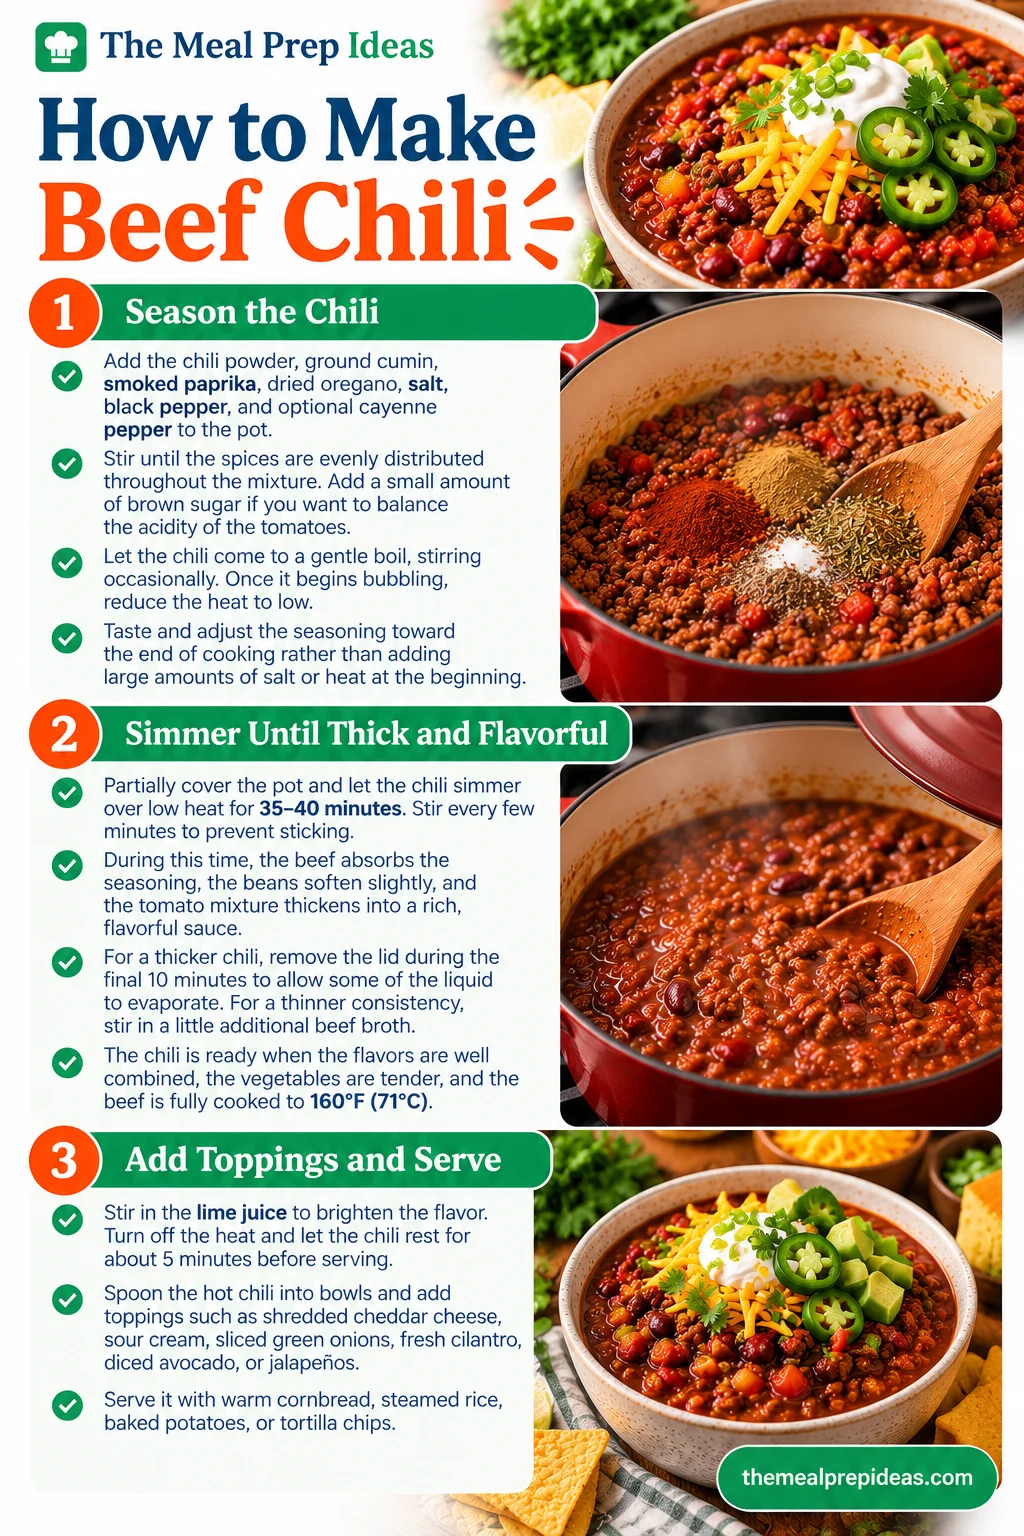
Beef Chili simmering with tomatoes, beans, ground spices, and herbs in a red Dutch oven.

Beef Chili Variations

Beef Options

Ground beef is a convenient choice for chili because it cooks quickly and breaks into small pieces that blend easily with the sauce. However, you can adjust the type of beef according to your preferred flavor and texture.

  • 80/20 ground beef: Provides a rich, juicy flavor and a traditional hearty texture. Drain excess fat if needed.
  • 85/15 ground beef: Offers a balance of flavor and fat, making it a versatile choice for homemade chili.
  • 90/10 lean ground beef: Creates a lighter chili with less fat, although you may want to add a little olive oil to prevent sticking.
  • Ground sirloin: A leaner option with a beefy flavor that works well in chili.
  • Small beef cubes: Beef chuck cut into small pieces can be used for a chunkier, slow-simmered version. It requires a longer cooking time to become tender.

Choose ground beef for a quicker weeknight meal or beef cubes when you want a more rustic texture and have additional time for cooking.

Bean Choices

Kidney beans are a classic choice for beef chili because they hold their shape well during simmering. Black beans add a mild earthy flavor, while pinto beans provide a softer and creamier texture.

Other options include:

  • Cannellini beans: Mild, creamy, and easy to combine with tomatoes and spices.
  • Navy beans: Small beans that soften nicely and create a smooth texture.
  • Chickpeas: Firm beans that add a slightly nutty flavor.
  • Pinto beans: A great alternative when you want a softer, hearty chili.

You can use one type of bean or combine two or three varieties. Drain and rinse canned beans before adding them to the pot. If you prefer bean-free chili, simply omit them and increase the amount of beef and vegetables.
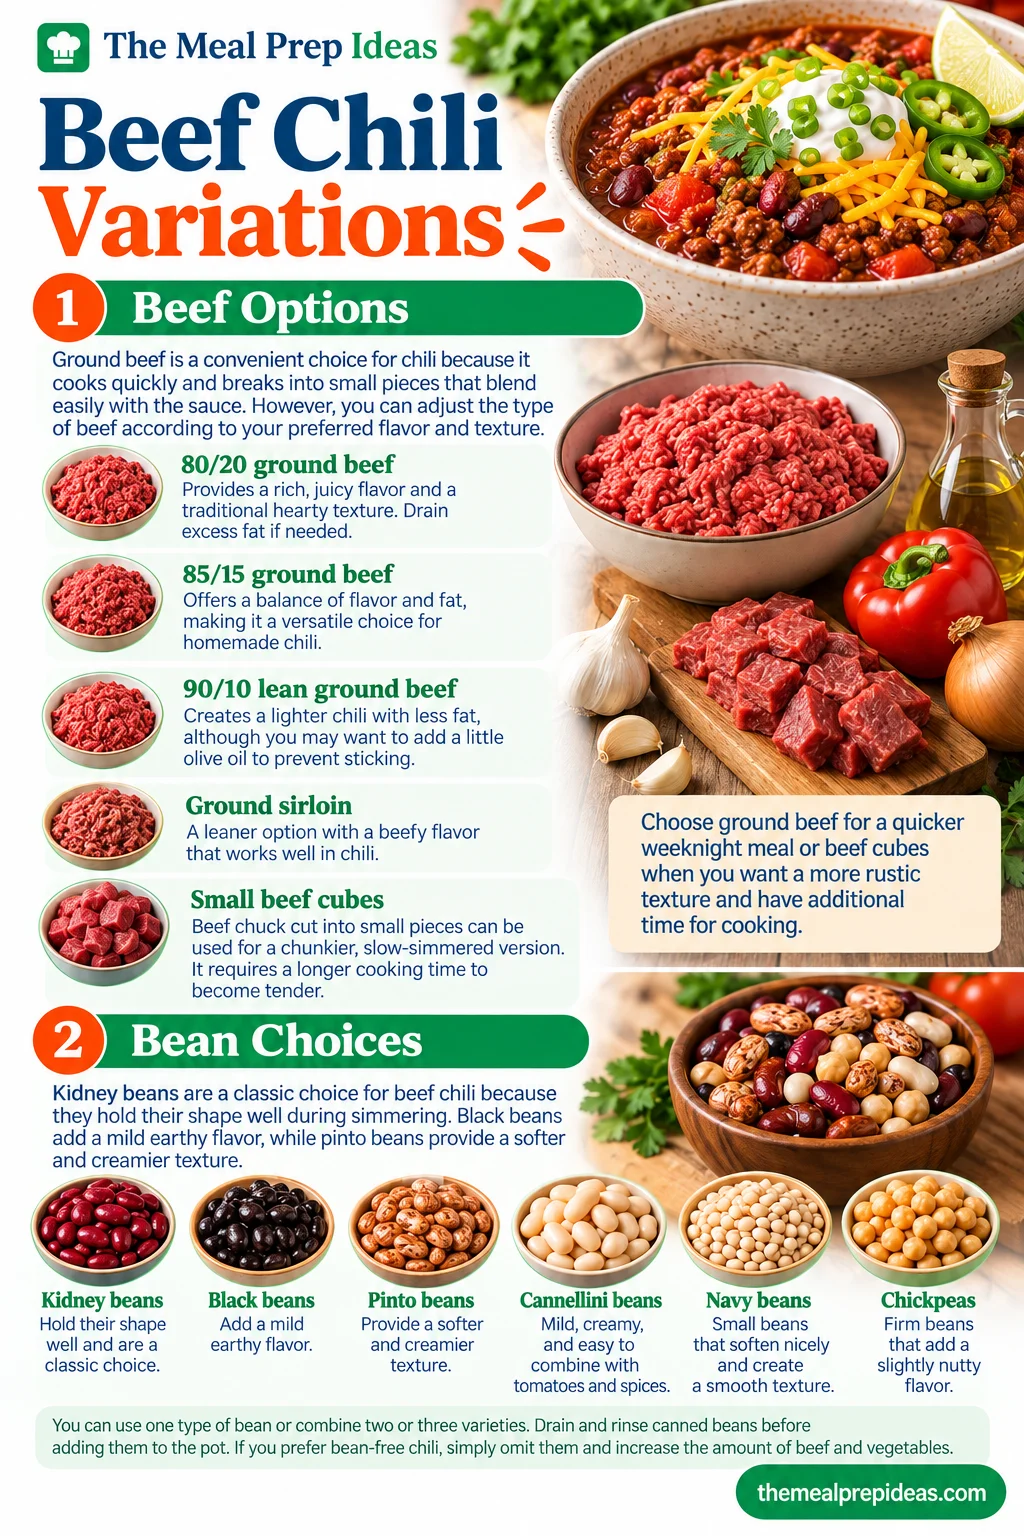
Different ground beef options and varieties of kidney, black, pinto, cannellini, and navy beans for homemade chili.

Spice Level

Beef chili can be mild, medium, or spicy depending on the seasonings you use.

  • Mild chili: Use the listed chili powder and omit the cayenne pepper and fresh hot peppers.
  • Medium chili: Add a small amount of cayenne pepper or finely diced jalapeño.
  • Spicy chili: Increase the cayenne gradually or add a little chipotle powder for heat and smokiness.
  • Smoky chili: Use extra smoked paprika or a small amount of chipotle seasoning.
  • Deeply seasoned chili: Add a little ground coriander or a pinch of cocoa powder for additional flavor complexity.

Spice blends vary in heat, so add extra seasoning gradually and taste as you cook. This makes it easier to reach the flavor you enjoy without overpowering the other ingredients.

Topping Ideas

The right toppings can add freshness, creaminess, crunch, and extra flavor to beef chili.

  • Cheese: Shredded cheddar, Monterey Jack, or a Mexican-style cheese blend melts nicely over hot chili.
  • Creamy toppings: Sour cream or plain Greek yogurt provides a cool contrast to the warm spices.
  • Fresh herbs: Chopped cilantro and sliced green onions add freshness.
  • Avocado: Diced or sliced avocado contributes a creamy texture.
  • Spicy toppings: Sliced jalapeños or a little hot sauce are suitable for those who enjoy extra heat.
  • Crunchy toppings: Tortilla chips, crushed tortilla strips, or toasted pumpkin seeds add texture.
  • Citrus: A squeeze of lime juice brightens the rich flavor.

For an easy serving setup, place the toppings in small bowls and let everyone customize their own portion. For another comforting dinner made with ground beef, try our Ground Beef Taco Casserole, a great option for family meals.
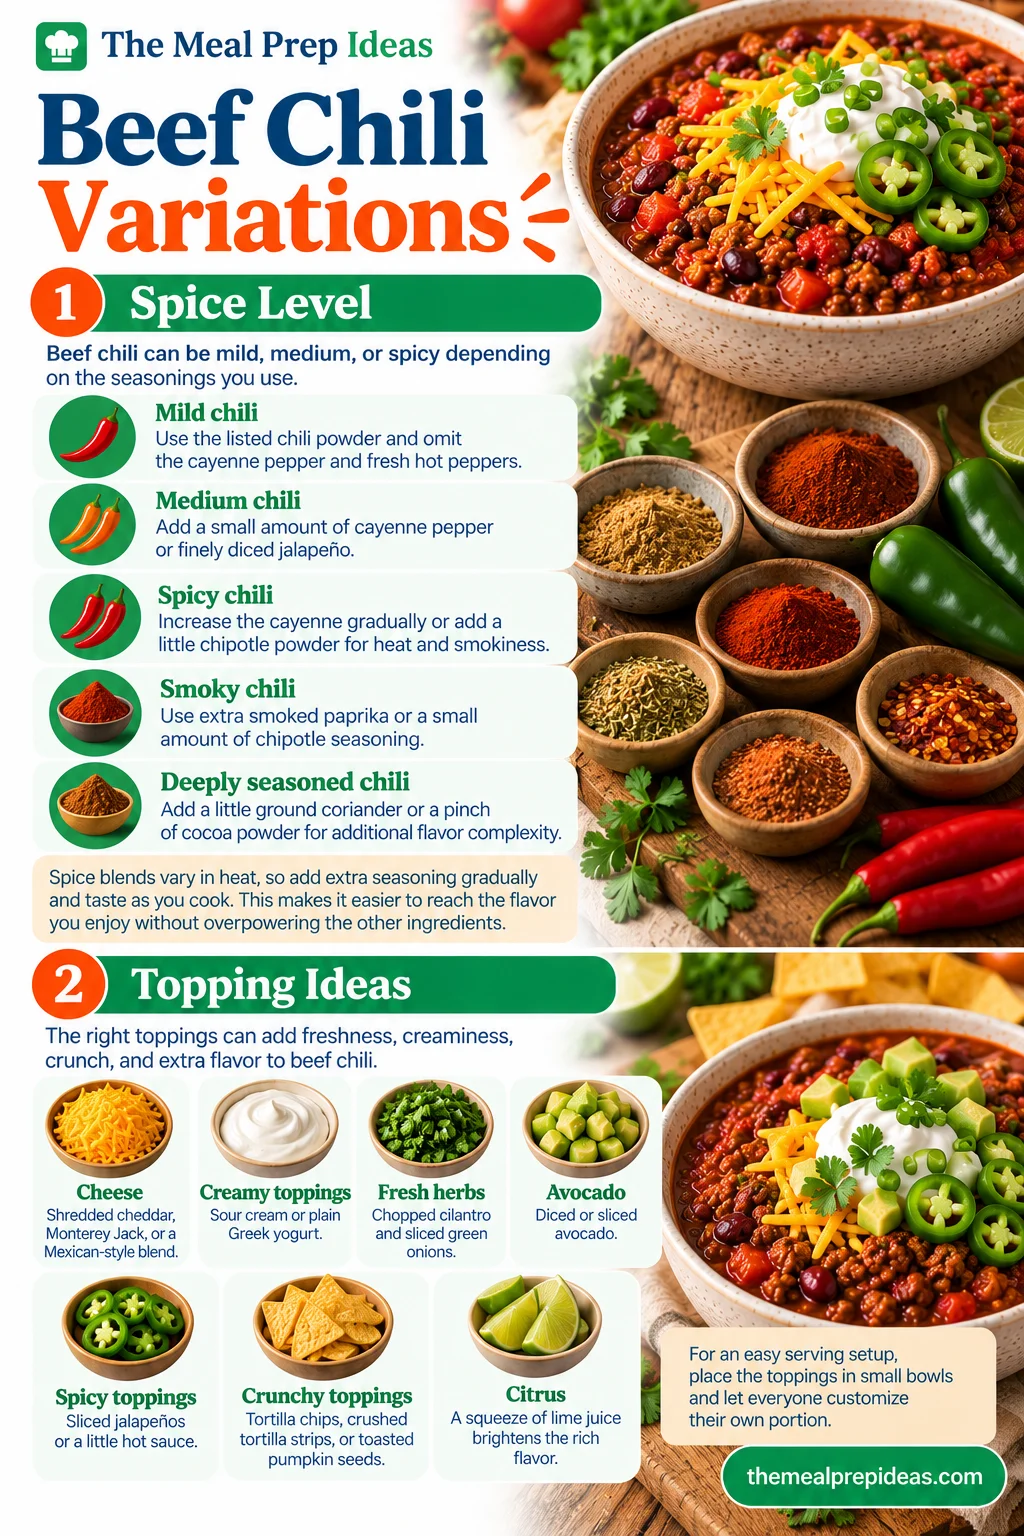
Beef Chili spice options ranging from mild to spicy, with cheese, avocado, jalapeños, herbs, and lime toppings.

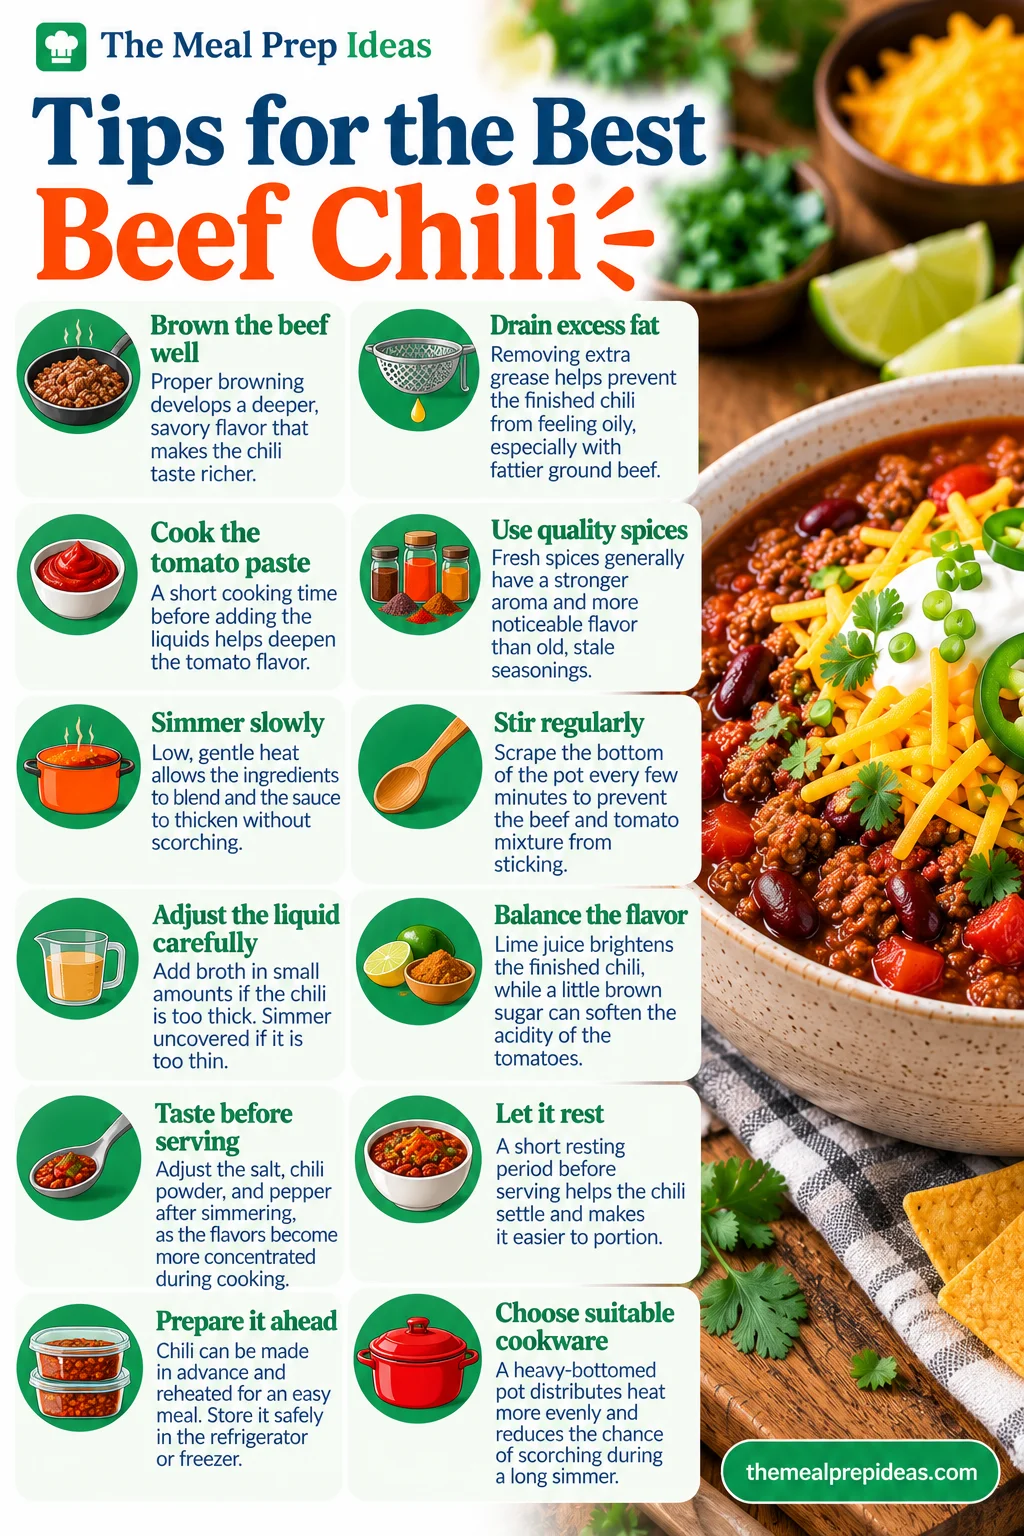
Tips for the Best Beef Chili

  • Brown the beef well: Proper browning develops a deeper, savory flavor that makes the chili taste richer.
  • Drain excess fat: Removing extra grease helps prevent the finished chili from feeling oily, especially when using fattier ground beef.
  • Cook the tomato paste: A short cooking time before adding the liquids helps deepen the tomato flavor.
  • Use quality spices: Fresh spices generally have a stronger aroma and more noticeable flavor than old, stale seasonings.
  • Simmer slowly: Low, gentle heat allows the ingredients to blend and the sauce to thicken without scorching.
  • Stir regularly: Scrape the bottom of the pot every few minutes to prevent the beef and tomato mixture from sticking.
  • Adjust the liquid carefully: Add broth in small amounts if the chili is too thick. Simmer uncovered if it is too thin.
  • Balance the flavor: Lime juice brightens the finished chili, while a little brown sugar can soften the acidity of the tomatoes.
  • Taste before serving: Adjust the salt, chili powder, and pepper after simmering, as the flavors become more concentrated during cooking.
  • Let it rest: A short resting period before serving helps the chili settle and makes it easier to portion.
  • Prepare it ahead: Chili can be made in advance and reheated for an easy meal. Store it safely in the refrigerator or freezer.
  • Choose suitable cookware: A heavy-bottomed pot distributes heat more evenly and reduces the chance of scorching during a long simmer.
Cooking tips for browning beef, seasoning chili, adjusting thickness, and preventing the sauce from sticking.

How to Store Beef Chili

Proper storage helps preserve the flavor and quality of leftover beef chili. Transfer leftovers to shallow, airtight containers and refrigerate or freeze them promptly. Do not leave cooked chili at room temperature for an extended period.

Refrigeration

Allow the chili to stop steaming heavily, then transfer it into shallow airtight containers. Refrigerate within 2 hours of cooking, or within 1 hour if the surrounding temperature is above 90°F (32°C).

Keep the chili in a refrigerator set at 40°F (4°C) or below. Properly stored leftovers generally remain safe to eat for 3-4 days.

For convenient meal prep, divide the chili into individual portions before refrigerating. This makes it easier to reheat only what you need while keeping the remaining portions chilled.

Freezing

Beef chili is suitable for freezing and can be prepared in larger batches for future meals. Allow the chili to cool slightly, then divide it into freezer-safe airtight containers or resealable freezer bags.

Leave a little space at the top of rigid containers to allow for expansion. Label each container with the date and store it in a freezer maintained at 0°F (-18°C) or below.

For the best quality, use frozen beef chili within about 2-3 months. It may remain safe for longer when continuously frozen, but its texture and flavor can gradually decline.

Thaw frozen chili overnight in the refrigerator when possible. You can also reheat it directly from frozen in a saucepan over low heat, stirring frequently and adding a little broth or water if needed.

Reheating Tips

Reheat beef chili on the stovetop by placing the desired portion in a saucepan over medium-low heat. Stir occasionally until it is steaming hot throughout. If the chili has thickened during storage, add a small splash of beef broth or water.

For microwave reheating, transfer a portion to a microwave-safe bowl and cover it loosely. Heat in short intervals, stirring between each interval to help the chili warm evenly.

Reheat leftovers to an internal temperature of 165°F (74°C). Use a food thermometer to check the temperature, particularly when reheating a large portion. Only reheat the amount you plan to eat, rather than repeatedly heating and cooling the entire batch. For another easy chili to prepare ahead, try our Easy Black Bean Chili, a satisfying option for make-ahead lunches and dinners.
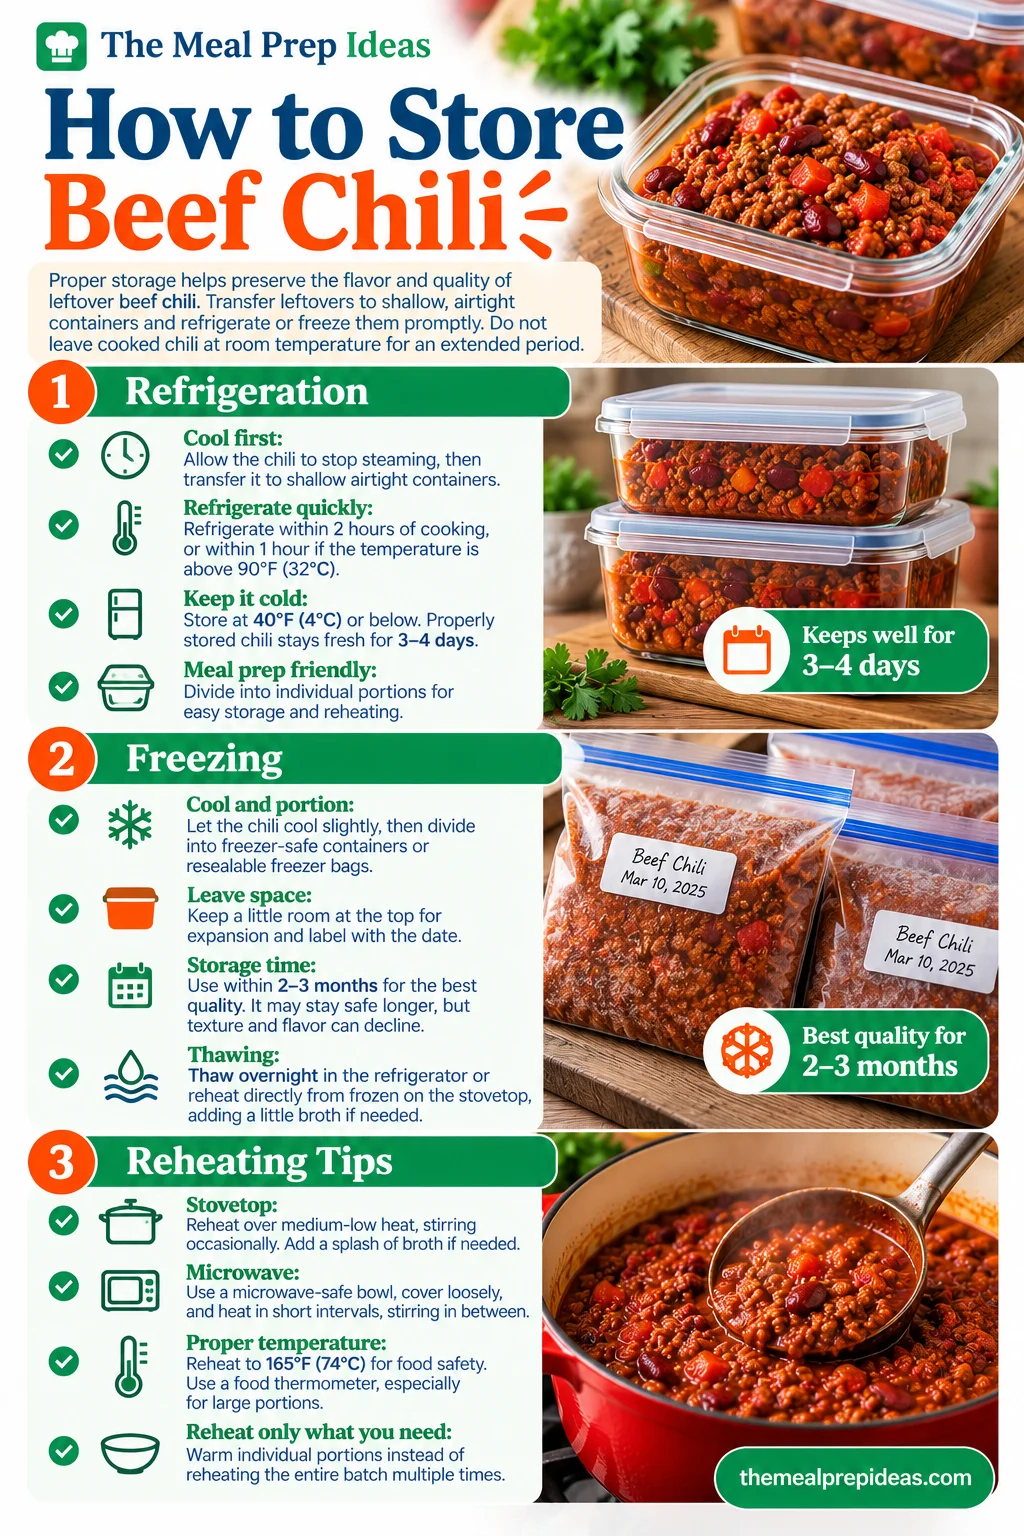
Cooked beef chili portioned into airtight containers and freezer bags for refrigeration, freezing, and reheating.

Frequently Asked Questions

What Type of Beef Is Best for Chili?

Ground beef with an 80/20 or 85/15 fat ratio is a great choice for chili because it provides a rich flavor and a satisfying texture. The small amount of fat helps keep the meat flavorful as it cooks with the tomatoes, beans, and spices.

If you prefer a leaner meal, 90/10 ground beef or ground sirloin can also work well. Drain any excess fat after browning to prevent the chili from becoming greasy. Beef chuck cut into small cubes is another option for a chunkier chili, but it requires a longer cooking time to become tender.

Can I Make Beef Chili in a Slow Cooker?

Yes, beef chili can be prepared in a slow cooker. For the best flavor and texture, brown the ground beef in a skillet first, then cook the onion, bell pepper, and garlic until softened.

Transfer the cooked mixture to the slow cooker and add the tomato paste, crushed tomatoes, beans, broth, and seasonings. Stir well, cover, and cook on LOW for 6-8 hours or HIGH for 3-4 hours, until the flavors have blended and the vegetables are tender.

Follow the slow cooker's instructions and avoid overfilling it. Check that the ground beef has reached a safe internal temperature of 160°F (71°C). Adjust the consistency with a little broth if needed, then finish with lime juice and your favorite toppings.

How Can I Thicken Beef Chili?

There are several simple ways to thicken beef chili without changing its main ingredients.

  • Simmer uncovered: Remove the lid and cook over low heat for a few extra minutes to allow excess liquid to evaporate.
  • Mash some beans: Mash a few spoonfuls of beans against the side of the pot and stir them back into the chili.
  • Add tomato paste: Stir in a small amount of tomato paste and simmer briefly to create a richer, thicker base.
  • Limit extra broth: Add broth gradually during cooking instead of pouring in too much at once.

Allow the chili to rest for a few minutes before serving, as it will often thicken slightly as it cools.

What Toppings Go Well with Beef Chili?

Beef chili pairs well with toppings that provide creamy, fresh, crunchy, or spicy contrasts. Shredded cheddar cheese, sour cream, sliced green onions, fresh cilantro, diced avocado, and jalapeños are all popular choices.

For extra crunch, add tortilla chips or crushed tortilla strips. Lime wedges provide a fresh, slightly tangy finish that balances the rich beef and tomato flavors. You can also serve chili with cornbread, rice, or baked potatoes for a more substantial meal.

How Long Can Beef Chili Be Stored in the Fridge?

Beef chili can generally be stored in the refrigerator for 3-4 days when kept in an airtight container at 40°F (4°C) or below.

Refrigerate it within 2 hours of cooking, or within 1 hour if the surrounding temperature is above 90°F (32°C). When ready to eat, reheat the portion to 165°F (74°C) until steaming hot throughout.

If you do not expect to eat the leftovers within 3-4 days, freeze them in suitable portions. For the best quality, use frozen chili within about 2-3 months.

No ratings yet

Beef Chili

Make this easy beef chili with ground beef, beans, tomatoes, and warming spices. A hearty one-pot meal perfect for family dinners and meal prep!

Bowl of beef chili with ground beef, kidney beans, corn, and crispy tortilla strips, served with bread rolls.the meal
prep ideas
15 minPrep
50 minCook
1 hr 5 minTotal
Makes 6Servings
Print recipe

Ingredients

0 of 19 gathered

How to prepare

  1. 1Prepare the ingredients: Dice the onion and red bell pepper, mince the garlic, and drain and rinse the canned beans. Measure the spices and keep them ready.
  2. 2Brown the beef: Heat a large Dutch oven or heavy-bottomed pot over medium-high heat. Add the ground beef and cook for 7-9 minutes, breaking it into small pieces with a wooden spoon, until browned and fully cooked. Drain excess fat if necessary.
  3. 3Cook the vegetables: If the pot is dry, add a little olive oil. Add the diced onion and red bell pepper. Cook for 4-5 minutes, stirring occasionally, until softened. Add the minced garlic and cook for another 30-60 seconds.
  4. 4Add tomato paste: Stir in the tomato paste and cook for about 1-2 minutes. This helps develop a deeper, richer flavor.
  5. 5Add tomatoes and beans: Pour in the crushed tomatoes and beef broth. Add the kidney beans and black beans, then stir to combine.
  6. 6Season the chili: Add chili powder, cumin, smoked paprika, oregano, salt, black pepper, and cayenne pepper if using. Add the brown sugar if you prefer a slightly balanced tomato flavor. Mix everything well.
  7. 7Simmer: Bring the mixture to a gentle boil, then reduce the heat to low. Partially cover the pot and simmer for 35-40 minutes, stirring every few minutes to prevent sticking.
  8. 8Adjust the flavor and consistency: Taste the chili and adjust the seasoning as needed. If it is too thin, simmer uncovered for a few additional minutes. If it is too thick, add a little more beef broth.
  9. 9Finish and serve: Stir in the lime juice and remove the pot from the heat. Let the chili rest for about 5 minutes, then serve warm with your preferred toppings.

Good to know

  • Choose the right ground beef: Ground beef with around 80/20 or 85/15 fat content gives the chili a rich flavor. If using fattier beef, drain excess grease after browning.
  • Brown the beef properly: Spread the beef across the hot pot and allow it to brown before stirring too often. This helps develop a deeper savory flavor.
  • Adjust the heat: Cayenne pepper is optional. Start with a small amount if you're unsure about the spice level, then adjust to taste.
  • Control the salt: Beef broth and canned tomatoes may already contain sodium. Use low-sodium options if preferred and add salt gradually.
  • Balance the tomatoes: A small amount of brown sugar can soften the acidity of the tomatoes, but it is optional.
  • Let it rest: Resting the chili for a few minutes before serving allows the flavors to settle and the texture to thicken slightly.
  • Use a heavy pot: A Dutch oven or thick-bottomed pot distributes heat more evenly and helps prevent the chili from sticking.
  • Check doneness: Ground beef should reach an internal temperature of 160°F (71°C).
  • Ground beef is a convenient choice for chili because it cooks quickly and breaks into small pieces that blend easily with the sauce. However, you can adjust the type of beef according to your preferred flavor and texture.
  • Choose ground beef for a quicker weeknight meal or beef cubes when you want a more rustic texture and have additional time for cooking.
  • Kidney beans are a classic choice for beef chili because they hold their shape well during simmering. Black beans add a mild earthy flavor, while pinto beans provide a softer and creamier texture.
  • Other options include:
  • You can use one type of bean or combine two or three varieties. Drain and rinse canned beans before adding them to the pot. If you prefer bean-free chili, simply omit them and increase the amount of beef and vegetables.
  • Beef chili can be mild, medium, or spicy depending on the seasonings you use.
  • Spice blends vary in heat, so add extra seasoning gradually and taste as you cook. This makes it easier to reach the flavor you enjoy without overpowering the other ingredients.
  • The right toppings can add freshness, creaminess, crunch, and extra flavor to beef chili.
  • For an easy serving setup, place the toppings in small bowls and let everyone customize their own portion. For another comforting dinner made with ground beef, try our Ground Beef Taco Casserole, a great option for family meals.
  • Proper storage helps preserve the flavor and quality of leftover beef chili. Transfer leftovers to shallow, airtight containers and refrigerate or freeze them promptly. Do not leave cooked chili at room temperature for an extended period.
  • Allow the chili to stop steaming heavily, then transfer it into shallow airtight containers. Refrigerate within 2 hours of cooking, or within 1 hour if the surrounding temperature is above 90°F (32°C).
  • Keep the chili in a refrigerator set at 40°F (4°C) or below. Properly stored leftovers generally remain safe to eat for 3-4 days.
  • For convenient meal prep, divide the chili into individual portions before refrigerating. This makes it easier to reheat only what you need while keeping the remaining portions chilled.
  • Beef chili is suitable for freezing and can be prepared in larger batches for future meals. Allow the chili to cool slightly, then divide it into freezer-safe airtight containers or resealable freezer bags.
  • Leave a little space at the top of rigid containers to allow for expansion. Label each container with the date and store it in a freezer maintained at 0°F (-18°C) or below.
  • For the best quality, use frozen beef chili within about 2-3 months. It may remain safe for longer when continuously frozen, but its texture and flavor can gradually decline.
  • Thaw frozen chili overnight in the refrigerator when possible. You can also reheat it directly from frozen in a saucepan over low heat, stirring frequently and adding a little broth or water if needed.
  • Reheat beef chili on the stovetop by placing the desired portion in a saucepan over medium-low heat. Stir occasionally until it is steaming hot throughout. If the chili has thickened during storage, add a small splash of beef broth or water.
  • For microwave reheating, transfer a portion to a microwave-safe bowl and cover it loosely. Heat in short intervals, stirring between each interval to help the chili warm evenly.
  • Reheat leftovers to an internal temperature of 165°F (74°C). Use a food thermometer to check the temperature, particularly when reheating a large portion. Only reheat the amount you plan to eat, rather than repeatedly heating and cooling the entire batch. For another easy chili to prepare ahead, try our Easy Black Bean Chili, a satisfying option for make-ahead lunches and dinners.
Gluten-FreeDairy-FreeLower-SodiumHigher-ProteinLower-Fat OptionBean-Free

Made this recipe?

Tag @themealprepideas on Instagram — we love seeing what you made.

Tag us

Reviews & Comments

Be the first to rate, review, or ask a question about this recipe.

No comments yet

Be the first cook to share feedback or ask a question about this recipe!

Leave a Review & Rating

Tap to rate

Comments are moderated for community safety. External links are filtered.

Keep Cooking

You Might Also Like

White Chicken Chili

5
White Chicken Chili

Make creamy White Chicken Chili with tender chicken, white beans, green chilies, and cream cheese. An easy one-pot meal perfect for dinner and meal prep!

15 min
Get Recipe

Red Lentil Soup With Lemon

Red Lentil Soup With Lemon

Make Red Lentil Soup with Lemon with tender lentils, fresh vegetables, warm spices, and bright lemon juice. An easy, comforting meal for lunch or dinner.

10 min
Get Recipe

Blue Zones Soup

Blue Zones Soup

Make this easy Blue Zones Soup with beans, fresh vegetables, leafy greens, and herbs. A hearty, plant-based soup perfect for meal prep.

15 min
Get Recipe

Get Your Free 7-Day Meal Prep Plan

Join 50,000+ subscribers getting weekly meal prep ideas, shopping lists, and time-saving tips straight to their inbox.

No spam. Unsubscribe anytime.